

From One Prompt to a Real Object
If you are new to digital fabrication, the hardest part is usually not pressing the print button. It is figuring out how to turn an idea in your head into a file that a machine can actually use. Many makers, 3D printing hobbyists, AI artists, and small creative businesses know exactly what they want to make — a custom keychain, a logo sign, a desk ornament, a relief plaque, a laser-cut gift tag, or a sticker-ready graphic — but get stuck somewhere between concept, file format, and fabrication.
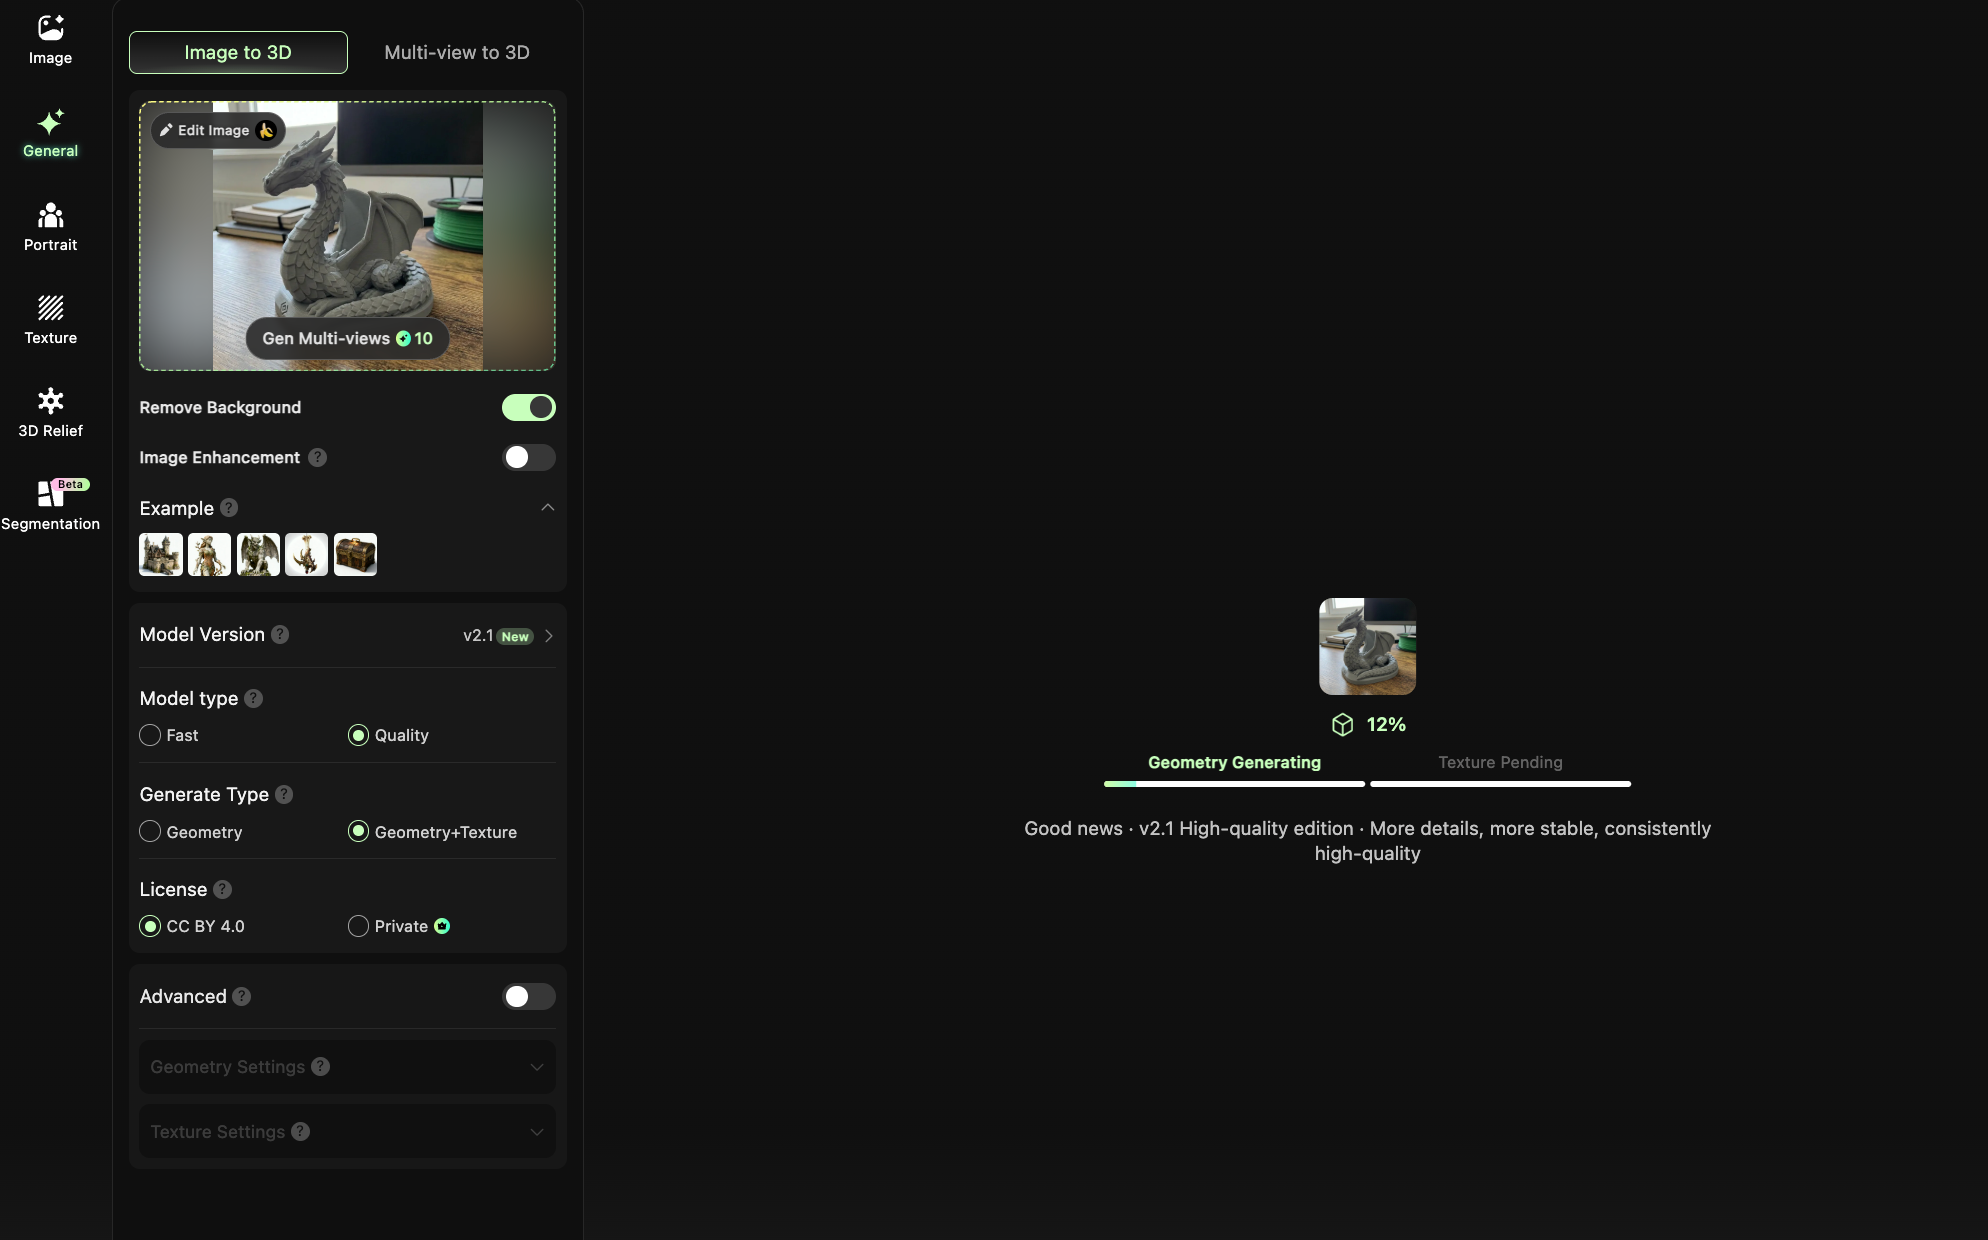
That is where Hi3D becomes useful. Instead of starting with complex CAD tools, you can begin with a sentence, a reference image, or a rough sketch. Then you can shape that idea into something that is much closer to a printable model, an engravable graphic, or a cut-ready design asset.
For beginners, this matters a lot. You do not need to master every 3D modeling workflow on day one. You can start with intent, generate options quickly, and then improve the design based on the manufacturing method you want to use.
Why AI Is Changing the Maker Workflow
Traditional digital making often means learning several tools at once: modeling software, repair tools, slicers, laser software, cut settings, export formats, and machine-specific parameters. That learning curve can be exciting for experienced makers, but it is also the reason many beginners give up before finishing their first project.
AI shortens the path between inspiration and experimentation. With Hi3D, you can test multiple directions quickly, which is ideal for:
- beginner-friendly 3D printing projects
- AI-generated product concepts
- custom laser engraving ideas
- personalized maker gifts
- vinyl cutter and paper craft graphics
- rapid prototyping for creators and Etsy-style sellers
Instead of asking, “Can I model this from scratch?” you can ask, “What is the fastest way to generate a solid starting point?”
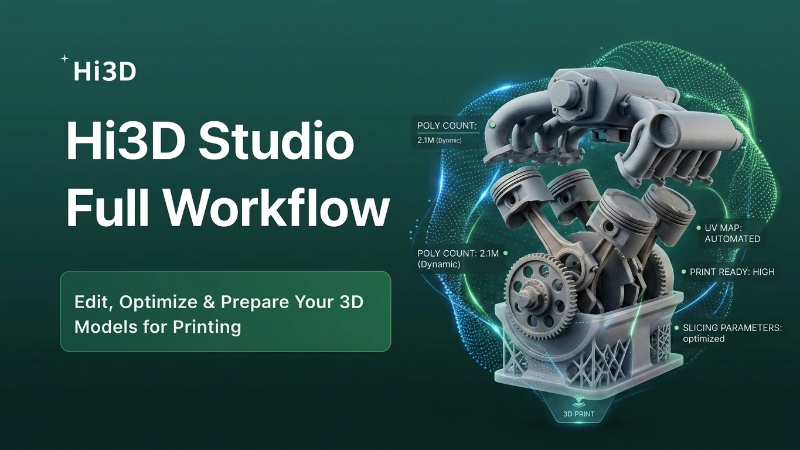
A Simple 6-Step Workflow for Beginners
A practical AI-to-making workflow usually looks like this:
- Start with an idea — Write a prompt or upload a photo, sketch, logo, or character concept.
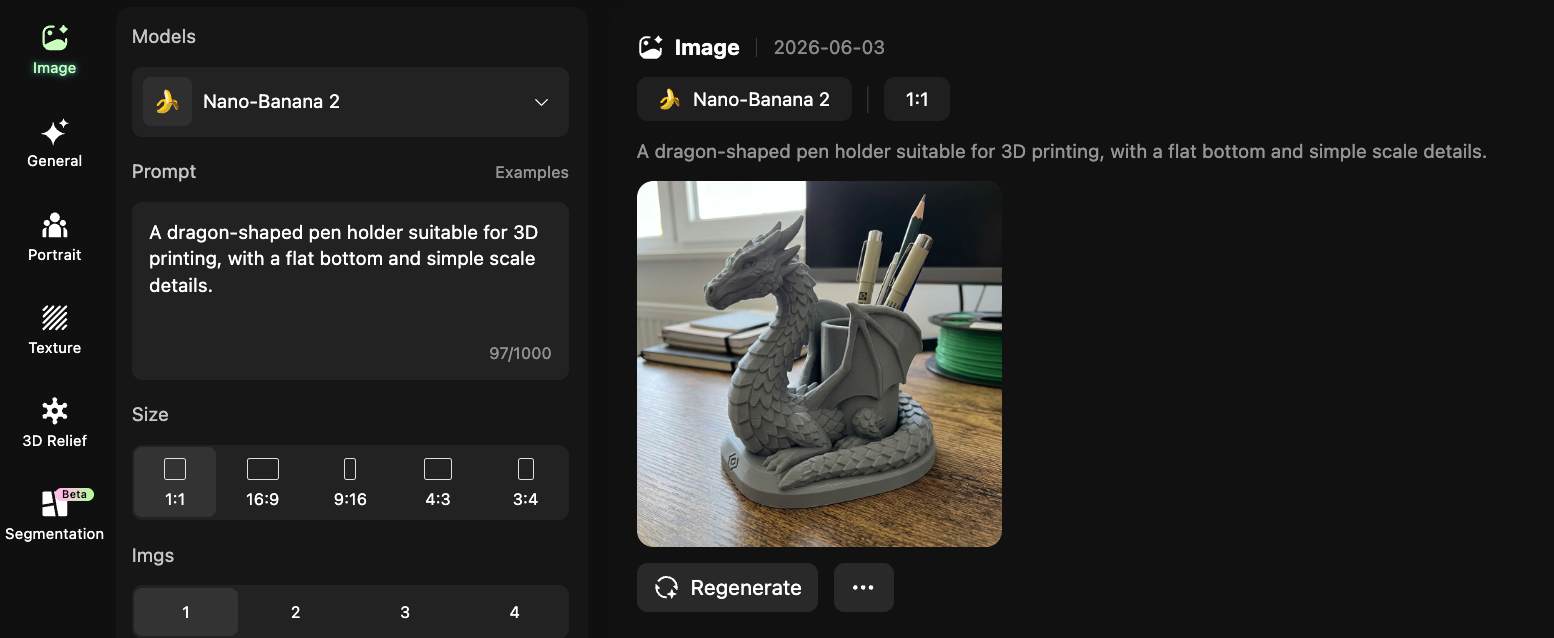
- Generate design directions — Explore multiple shapes, styles, and compositions in Hi3D.
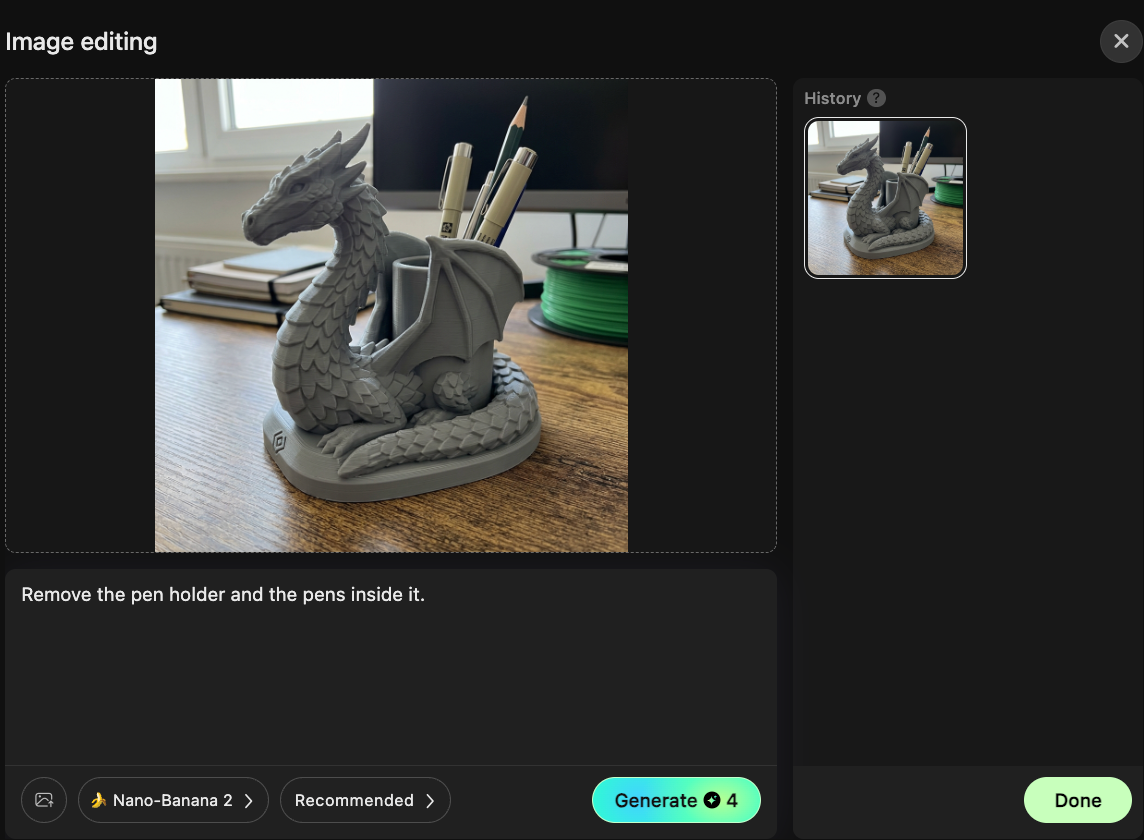
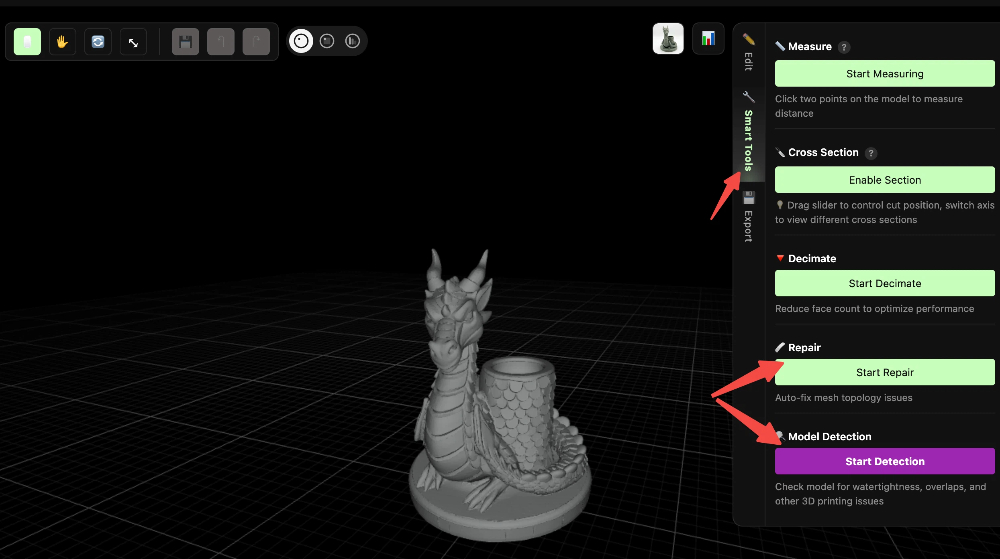
- Check manufacturability — Make sure the design is realistic for 3D printing, laser cutting, engraving, or craft cutting.
- Export the right file — Choose a format that matches your next tool or machine.
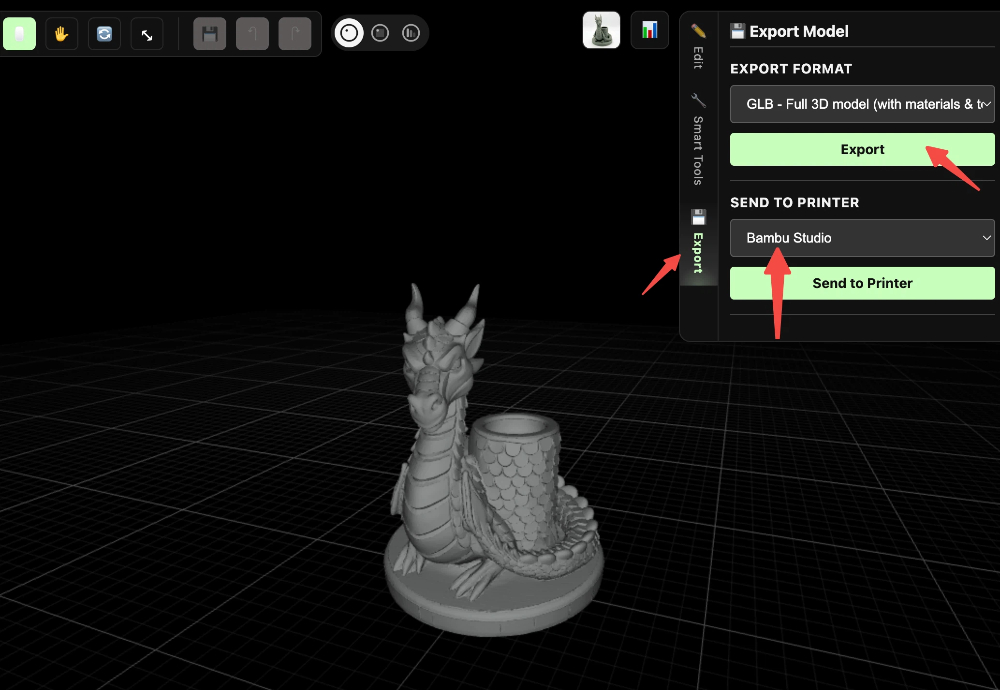
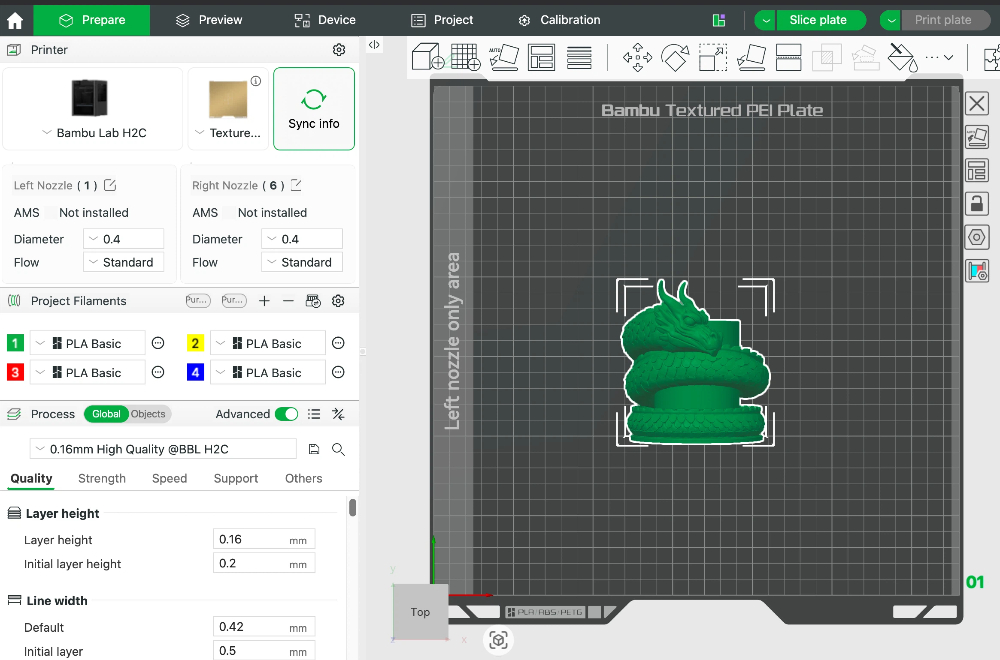
- Move into production software — Slice for FDM printing, prepare power and speed settings for laser work, or set cutting paths for a vinyl or blade cutter.
- Make, test, and refine — Print, cut, engrave, assemble, and then improve the next version.
This process sounds simple, but it is powerful because it helps you think like a maker from the beginning. A cool-looking design is not enough. A real project needs to be manufacturable.
What Changes for 3D Printing, Laser, and Cutting Machines
The same concept may need very different design choices depending on the production method.
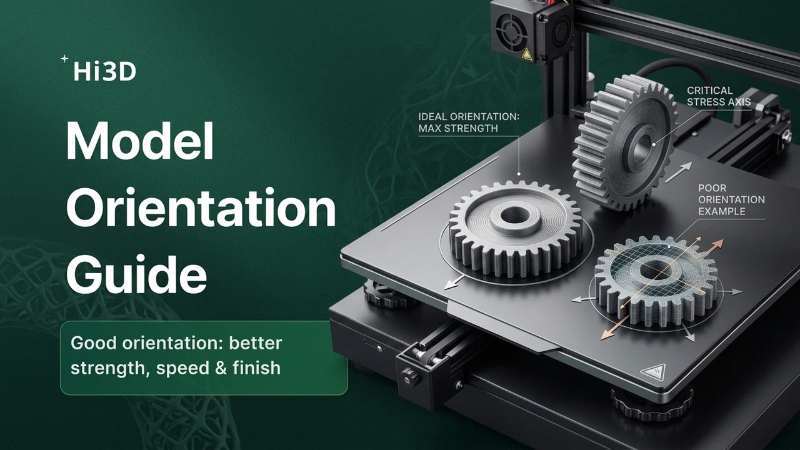
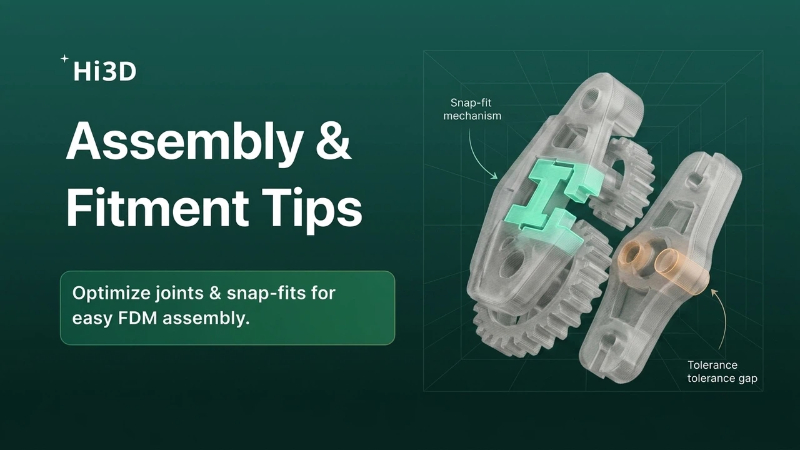
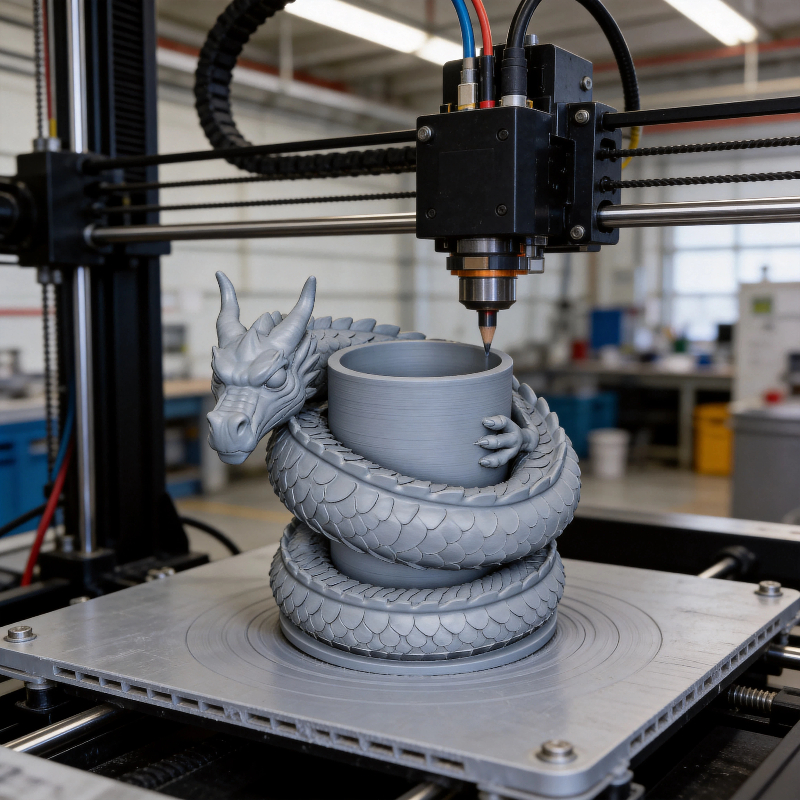
For FDM 3D printing, you want a model with stable geometry, enough wall thickness, fewer fragile overhangs, and a base that sits well on the print bed. If you are writing a prompt, include phrases like flat bottom, printable thickness, stable base, or support-friendly structure.
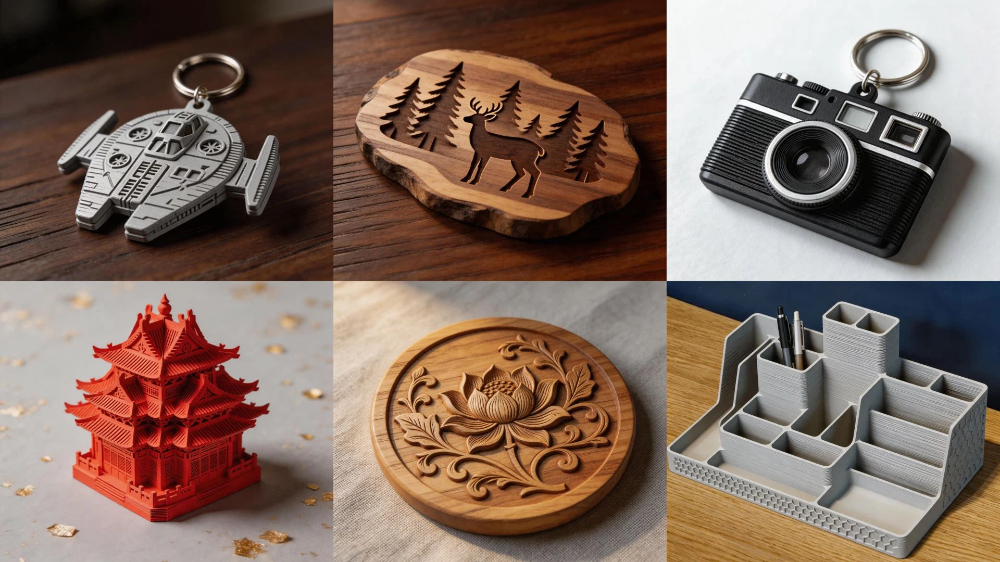
For laser cutting and laser engraving, your design should focus more on silhouette, contrast, layers, line clarity, and cut logic. This is especially important for wood signs, acrylic tags, engraved coasters, and layered decorative panels.
For vinyl cutting, sticker making, paper craft, and blade cutting workflows, you need clean outlines, readable contours, and shapes that are easy to weed. Overly tiny details may look great on screen but become frustrating in real production.
What Hi3D Helps You Do
Hi3D is not just a “make a 3D model” tool. It is better understood as an early-stage creative engine for maker workflows.
It helps you:
- turn prompts into visual and model directions
- explore multiple product concepts quickly
- prepare ideas for 3D printing, laser engraving, and cutting projects
- reduce the blank-page problem for beginners
- move from inspiration to a workable file faster
This makes it especially valuable for:
- makers building personal projects
- 3D printing beginners learning by doing
- AI creators making physical merchandise
- laser engraving hobbyists creating custom gifts
- Cricut and vinyl cutter users exploring AI-assisted graphics
- educators and maker spaces teaching digital fabrication
Real Projects You Can Make with Hi3D
Once you start thinking in terms of manufacturable assets, many project ideas become easier to plan.
For 3D printing, you can use Hi3D for concept generation around:
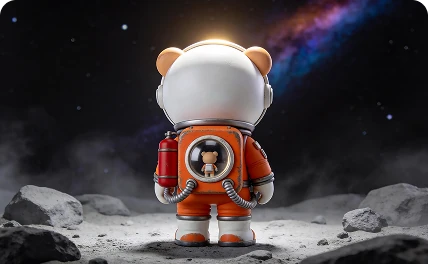
- desk toys and mini figurines
- keychains and charms
- product mockups
- organizer accessories
- relief plaques and decorative models
For laser work, strong project categories include:
- engraved wooden signs
- acrylic name tags
- layered wall art
- coasters and gift items
- decorative maker-brand packaging elements
For blade cutting and craft cutting, Hi3D can support:
- sticker packs
- heat transfer vinyl graphics
- packaging templates
- paper craft elements
- custom labels and event decor
The key is to start with small, low-risk projects. A simple keychain, coaster, sticker set, or desk sign will teach you more than an overly ambitious first build.