You found a great model online, loaded it into your slicer, selected a recommended profile, and started printing. Everything looked fine—until the first layer began peeling off the build plate.
For many FDM users, this experience is frustratingly familiar. When a print fails, beginners often blame the model, the slicer, or the printer itself. In reality, most failed prints can be traced back to a few simple setup mistakes that happen before printing even begins.
The good news is that these problems are easy to prevent once you know what to look for.
Why the First Layer Matters More Than Everything Else
Think of the first layer as the foundation of a building. If the foundation is unstable, every layer above it inherits that weakness.
A poorly prepared printer can lead to:
- First-layer adhesion issues
- Warping and corner lifting
- Uneven extrusion
- Layer shifting later in the print
- Complete print failures
Before adjusting advanced slicer settings, it’s worth making sure the basics are correct.
Scenario #1: The Nozzle Is Too Close—or Too Far
One of the most common causes of failed prints is incorrect nozzle height.
When the nozzle is too close to the build plate, filament becomes over-compressed. Instead of forming smooth lines, it gets squashed sideways, creating rough surfaces and inconsistent extrusion.
Typical symptoms include:
- Nozzle dragging across the print
- Rough first layers
- Extruder clicking noises
- Material buildup around the nozzle
On the other hand, if the nozzle is too high, the filament won’t properly bond to the build plate.
You’ll often see:
- Gaps between extrusion lines
- Filament curling around the nozzle
- Corners lifting after a few layers
A properly adjusted first layer should look slightly flattened but still maintain clearly defined extrusion lines.
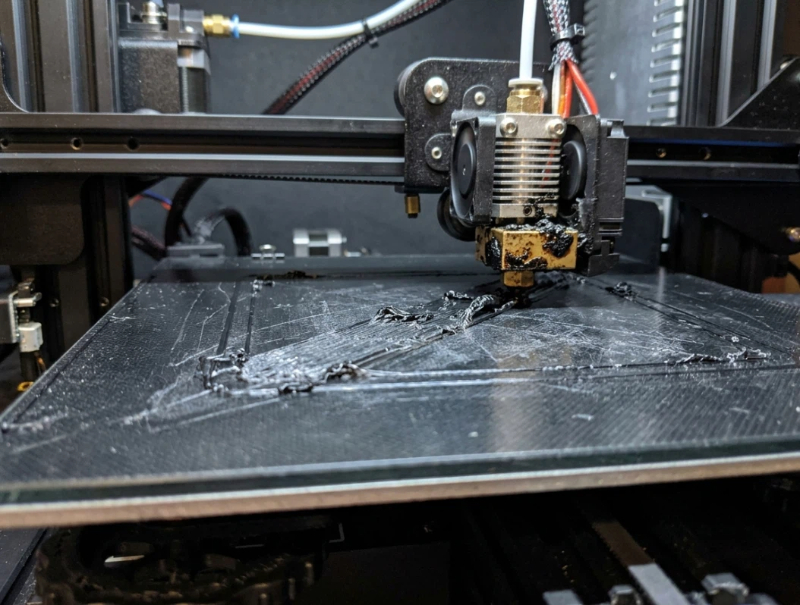
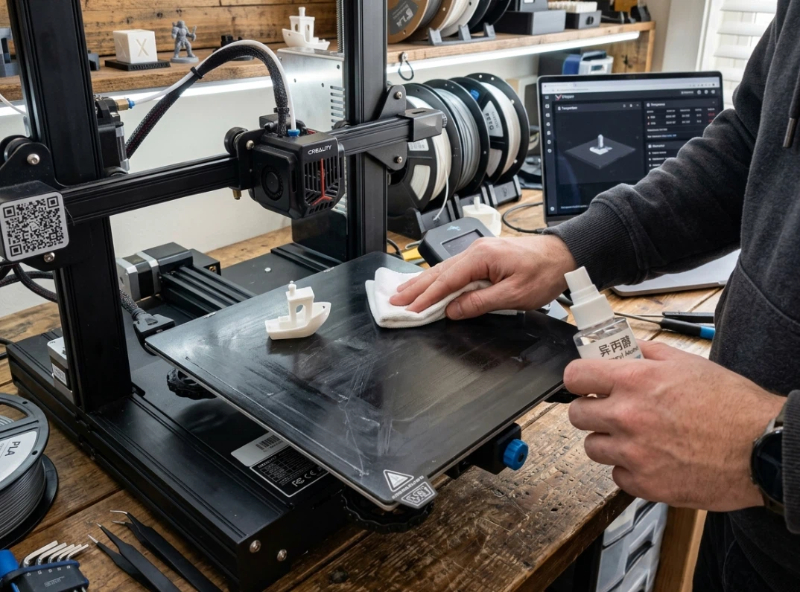
Scenario #2: Your Bed Looks Clean—But Isn’t
Many makers spend hours tuning temperatures while completely overlooking one simple issue: a dirty build plate.
Even invisible fingerprints can significantly reduce adhesion.
Every time you remove a print, your fingers leave behind oils. Dust from the room gradually accumulates. Adhesive residue builds up over time.
The result?
The first layer sticks perfectly in some areas while lifting in others.
If you’re experiencing random adhesion issues, cleaning the plate should be one of the first troubleshooting steps.
For most build surfaces:
- Use isopropyl alcohol between prints
- Wash periodically with warm water and dish soap
- Avoid touching the print area unnecessarily
Many users are surprised by how much print quality improves after a proper cleaning.
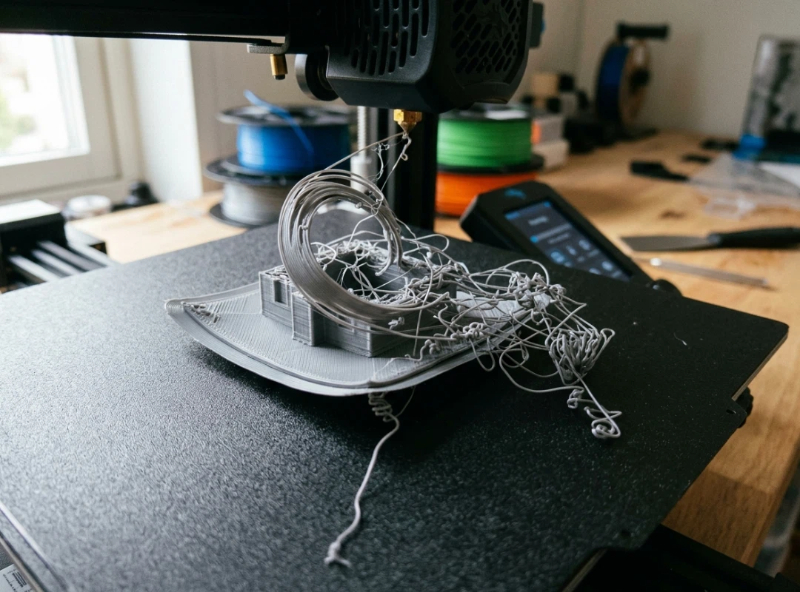
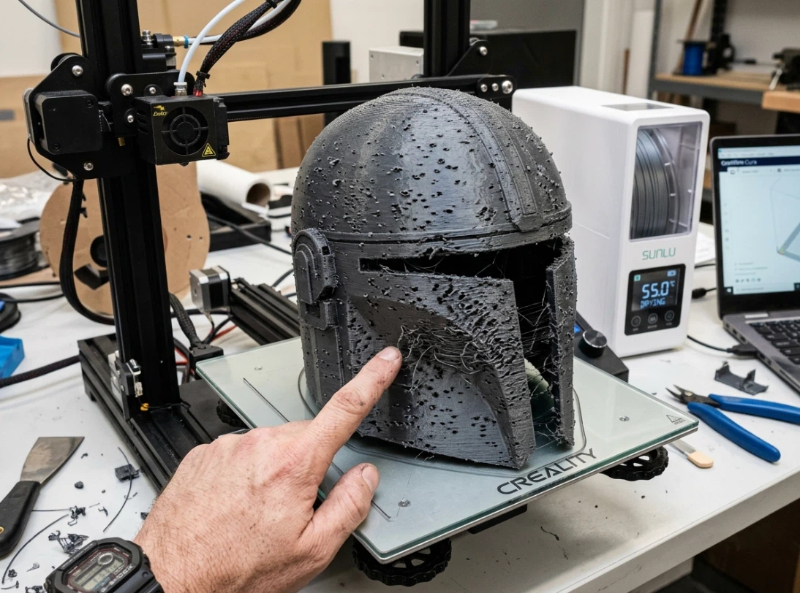
Scenario #3: The Filament Is the Real Problem
Imagine printing a large cosplay helmet.
You’ve calibrated your printer. Your temperatures are correct. Your bed is level.
Yet the print is covered in stringing and rough surfaces.
The culprit may be moisture.
Materials such as PETG, ABS, TPU, and Nylon absorb moisture from the air surprisingly quickly. As wet filament passes through a hot nozzle, trapped water turns into steam, causing bubbles and inconsistent extrusion.
Common signs include:
- Excessive stringing
- Rough surface texture
- Popping or crackling sounds
- Weak layer adhesion
Many users attempt to fix these issues through retraction settings when the real solution is simply drying the filament.
A filament dryer is often one of the most effective upgrades a maker can buy.
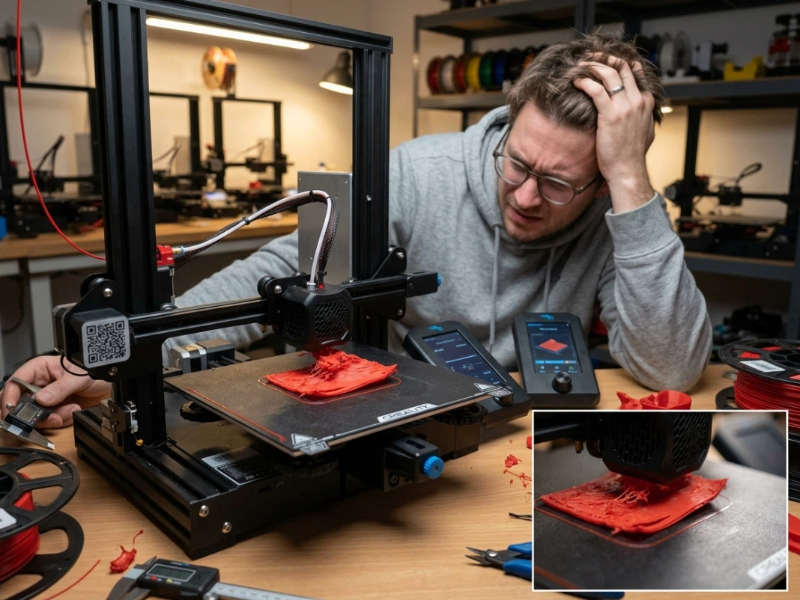
Scenario #4: Rushing the First Layer
Modern printers are fast, and many users try to maximize speed immediately.
Unfortunately, the first layer is not where you want to save time.
Printing the first layer too quickly often causes:
- Poor adhesion
- Uneven extrusion
- Corner lifting
- Entire models separating from the bed
A slower first layer gives the filament more time to bond with the build surface.
Even on high-speed printers, reducing first-layer speed often improves reliability dramatically.
Think of it as spending an extra two minutes to avoid wasting two hours.
A Simple Pre-Print Checklist
Before every print, ask yourself:
✓ Is the bed level?
✓ Is the nozzle height correct?
✓ Is the build plate clean?
✓ Is the filament dry?
✓ Is the first-layer speed reasonable?
This entire checklist takes less than five minutes but prevents many of the most common printing failures.