At Hitem3D, we believe that 3D creation should be efficient and seamless. Our latest Blender plugin empowers you to integrate AI-generated geometry and high-quality textures directly into your workflow, all within Blender. With our plugin, you can now generate geometry, refine your models, and create textures—all in one place.
Whether you’re working on character models, environments, or props, this plugin is designed to streamline your process and take your creations to the next level.
In this step-by-step guide, we’ll walk you through the process of installing and using the Hitem3D Blender plugin, so you can start working with AI-generated models and textures in no time.
What You Can Do with the Hitem3D Blender Plugin
Generate AI-Based Geometry:
Use the plugin to generate 3D models with AI. Refine these models directly in Blender with full creative control.Create High-Quality Textures for Existing Models:
Apply AI-generated textures to your geometry, whether it’s created with Hitem3D or imported from other sources. No remeshing required!Complete Your Workflow in One Place:
From generating and editing geometry to texturing and exporting, all tasks can be completed in Blender with the Hitem3D plugin.
What You’ll Need
Before we begin, here’s what you need to follow along:
Blender (v4.5.1+ recommended)
A Hitem3D account
The Hitem3D Blender plugin (available on the official Hitem3D website)
About the Hitem3D Blender plugin Installation
Getting started with the Hitem3D Blender plugin is quick and easy. Follow these steps to install the plugin in less than a minute:
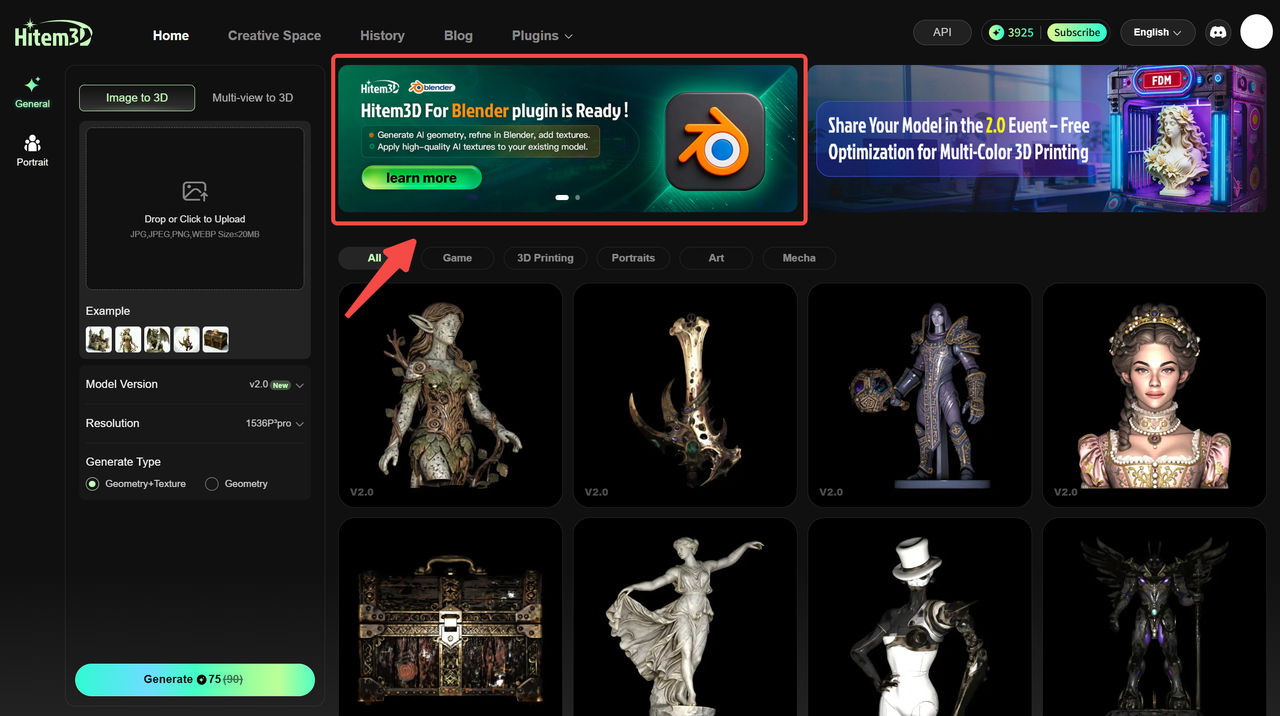
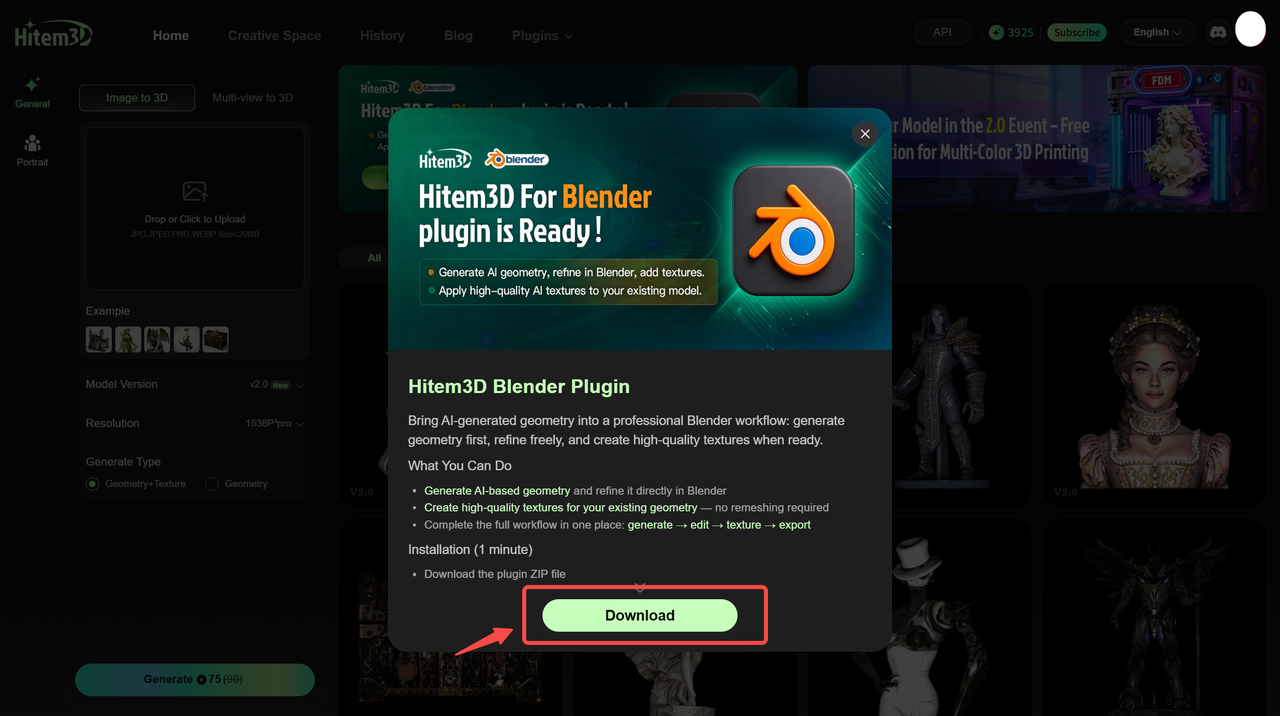
- Download the Plugin:
Head over to the Hitem3D website and download the Blender plugin ZIP file.
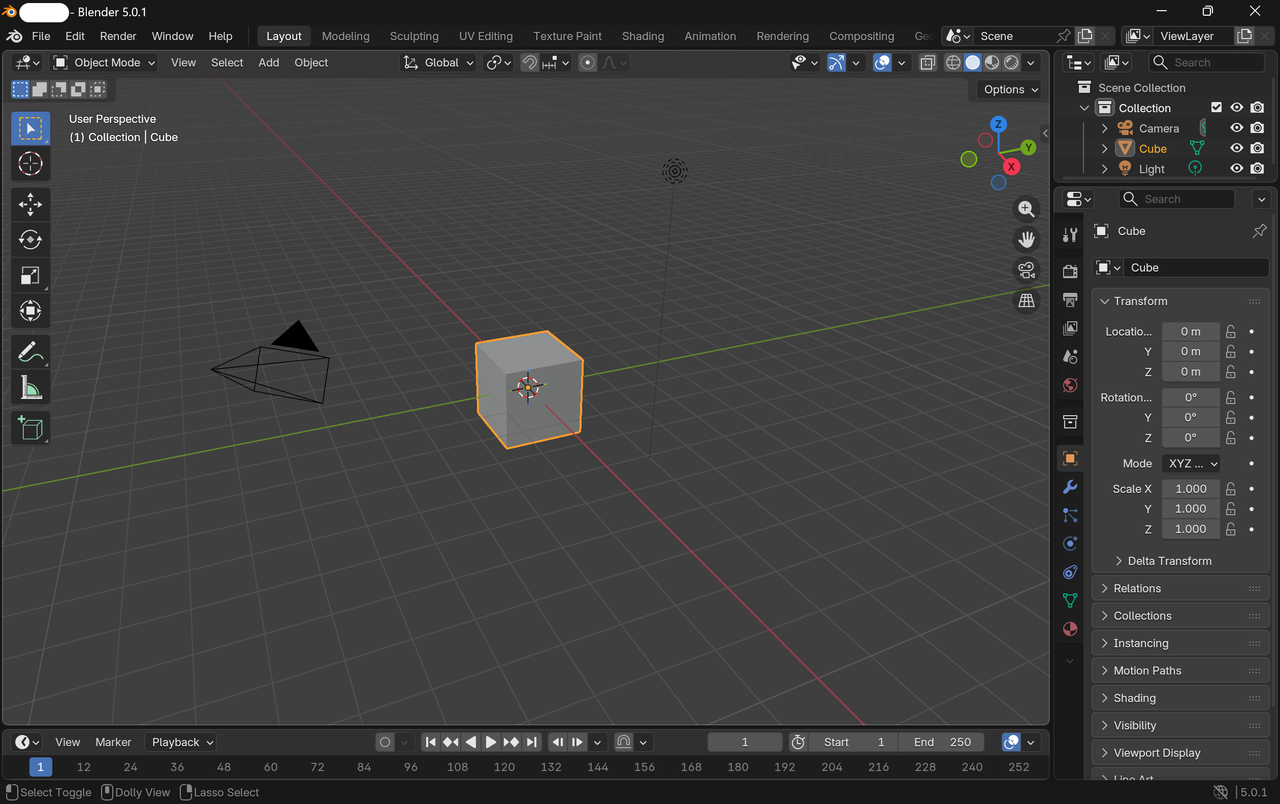
- Open Blender:
Launch Blender on your computer.
- Before Installing the New Version
To avoid conflicts, please uninstall the existing plugin first. After closing and restarting Blender, proceed with installing the new plugin version.
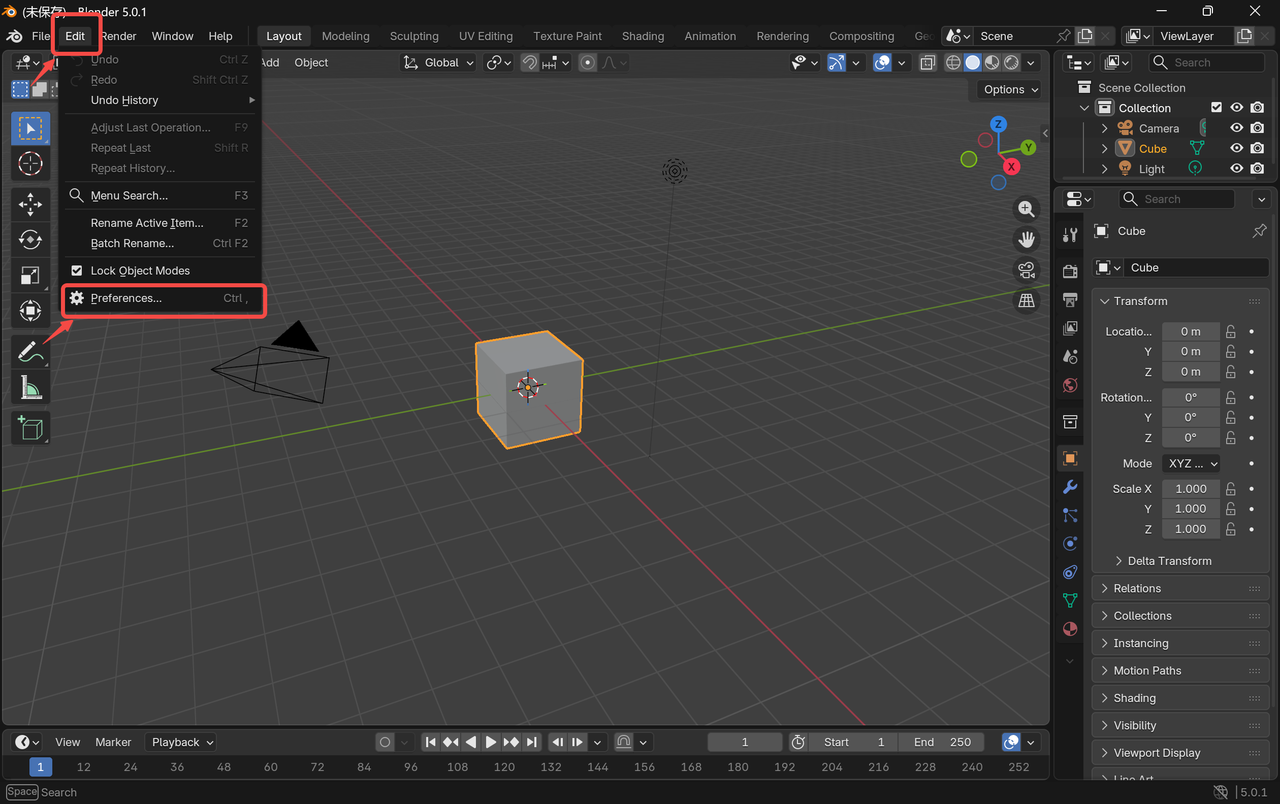
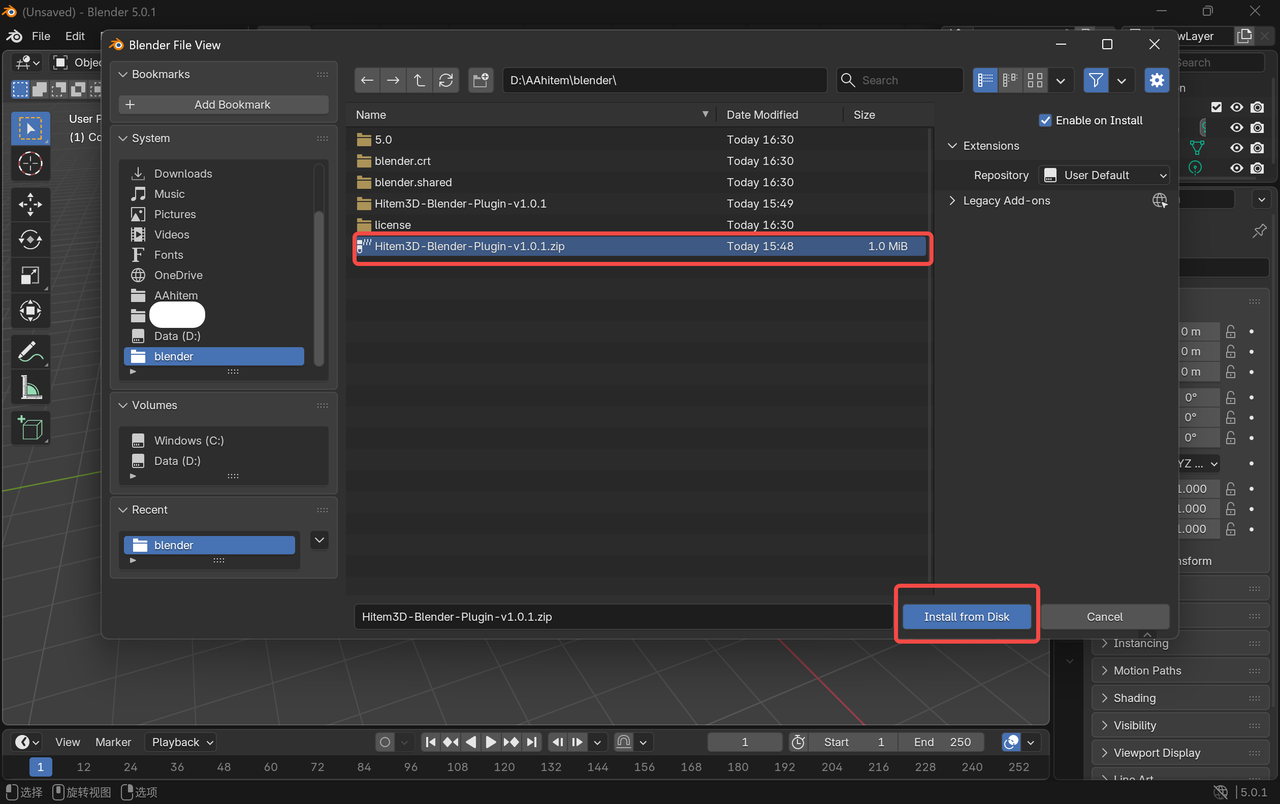
- Install the Plugin:
Go to Edit → Preferences → Add-ons. Then, click Install and select the downloaded ZIP file you just downloaded.

- Enable the Add-on:
After installation, check the box next to Hitem3D Plugin to enable it.
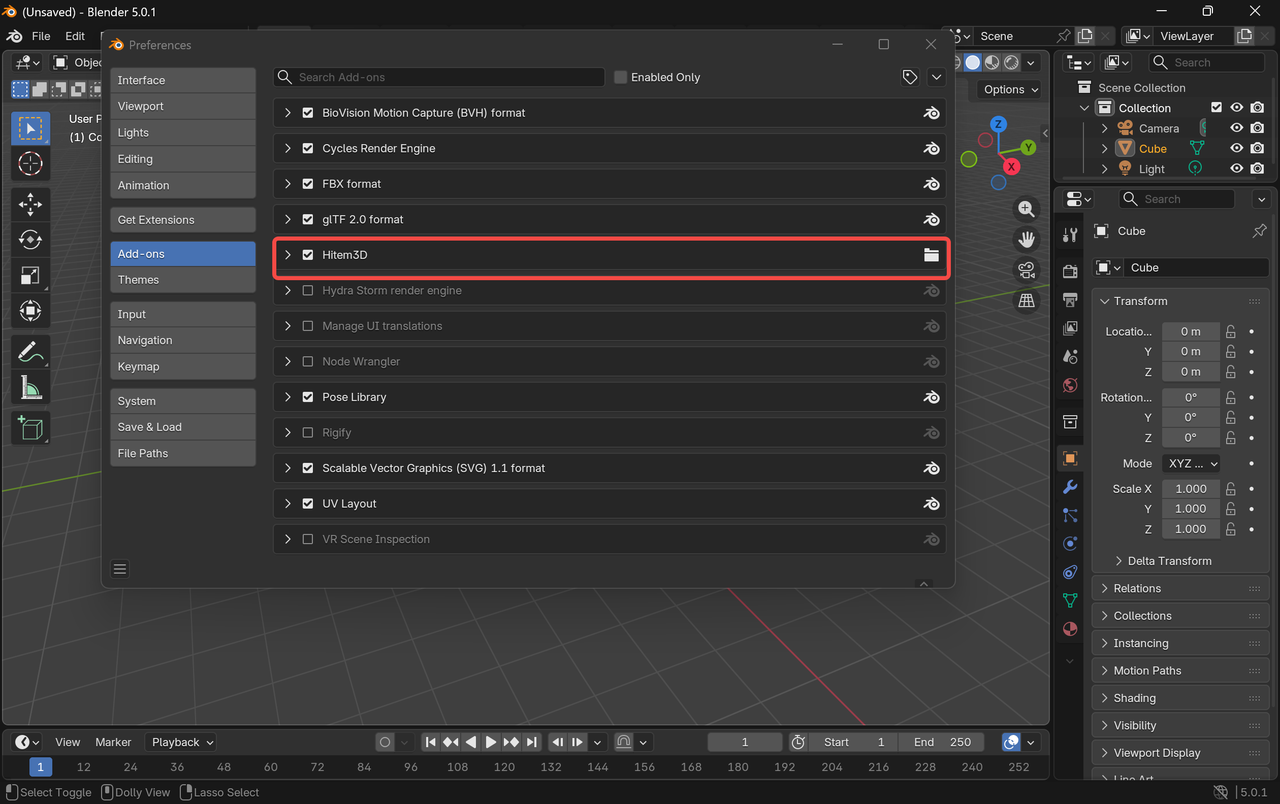
Now, you’re ready to start generating AI-based geometry and textures in Blender!
How to Use the Hitem3D Blender Plugin
Once the plugin is installed, follow these steps to start using its powerful features:
Step 1: Authenticate the Plugin
To access Hitem3D’s cloud-based assets, you need to link your Hitem3D account:
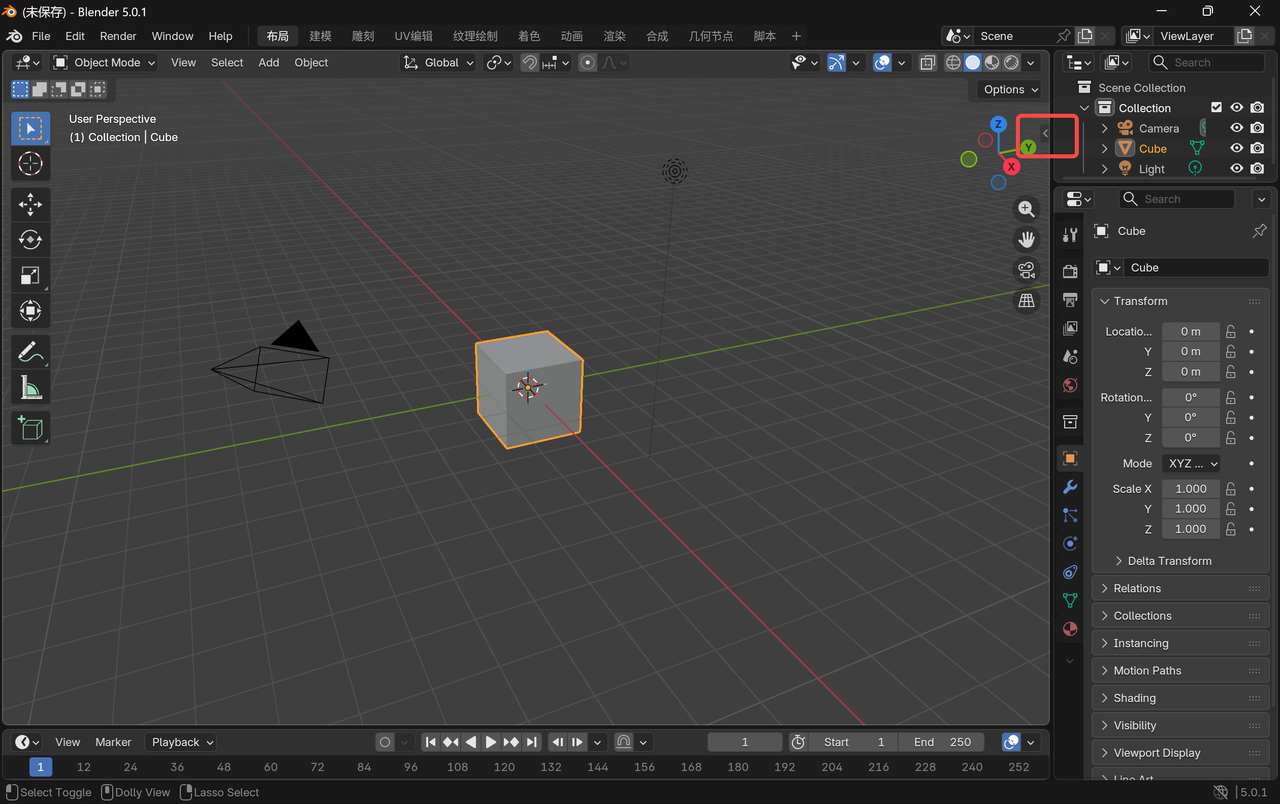
- Open the Hitem3D panel in Blender:
Open the Hitem3D panel in Blender(press “N” to open it), located on the right side of the interface.
- Paste your Hitem3D account credentials as prompted, then click Go Billing to continue.
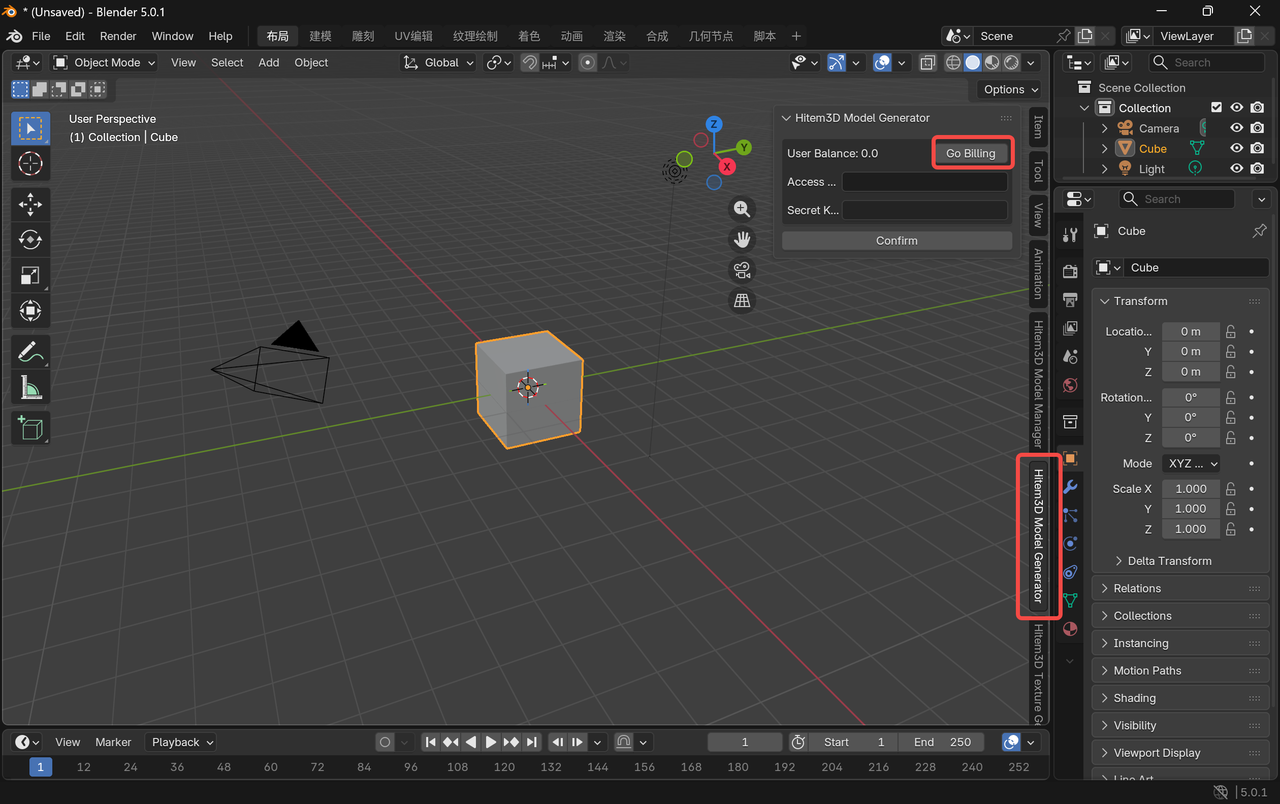
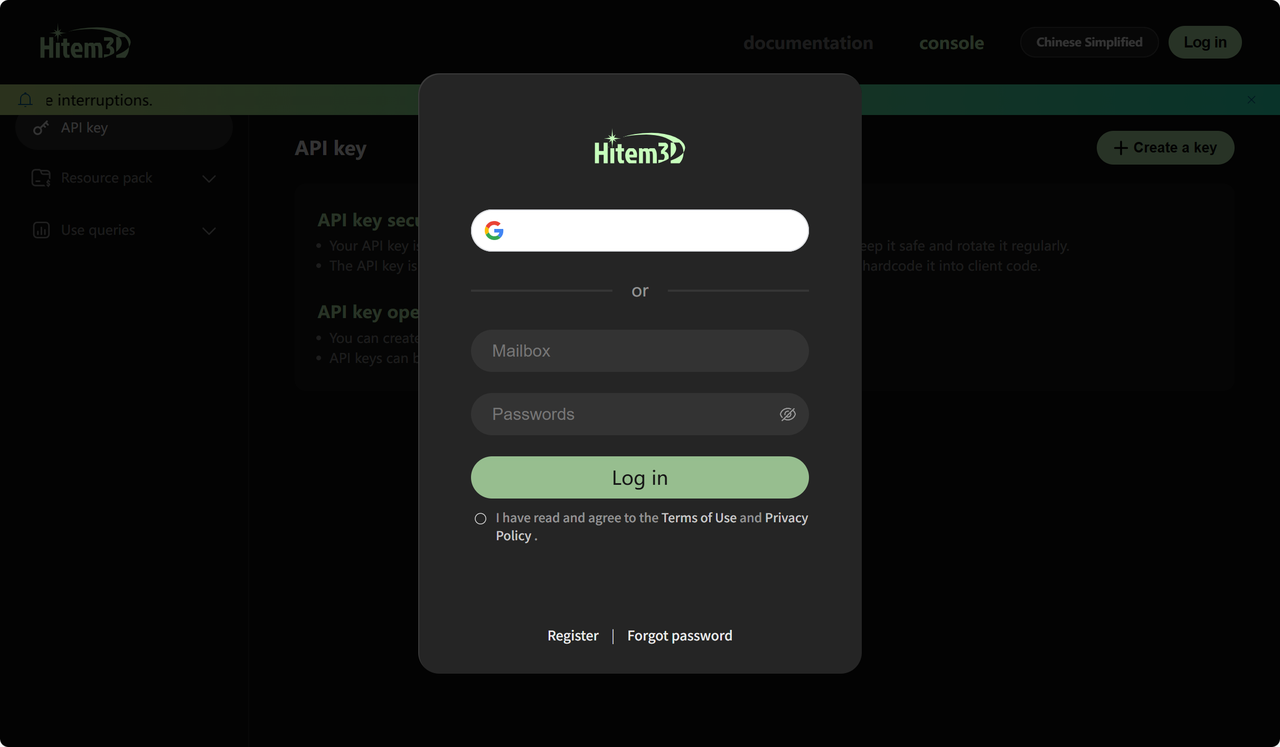
- This will open a new page where you’ll be prompted to enter your Hitem3D account password again for authentication.
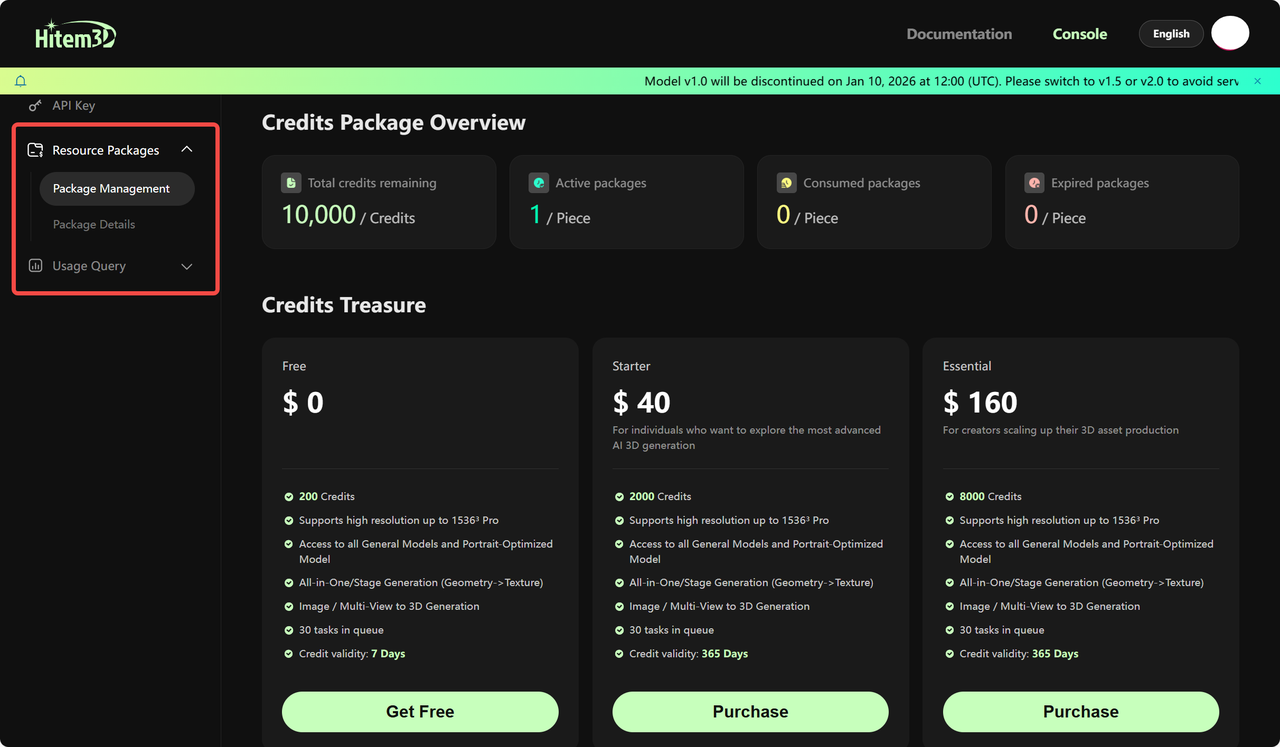
- Once logged in, navigate to Resource Packages.You can purchase credit packages based on your needs. New users can receive 200 free credits upon their first purchase.
- The Blender plugin consumes credits exclusively from your API credit package.
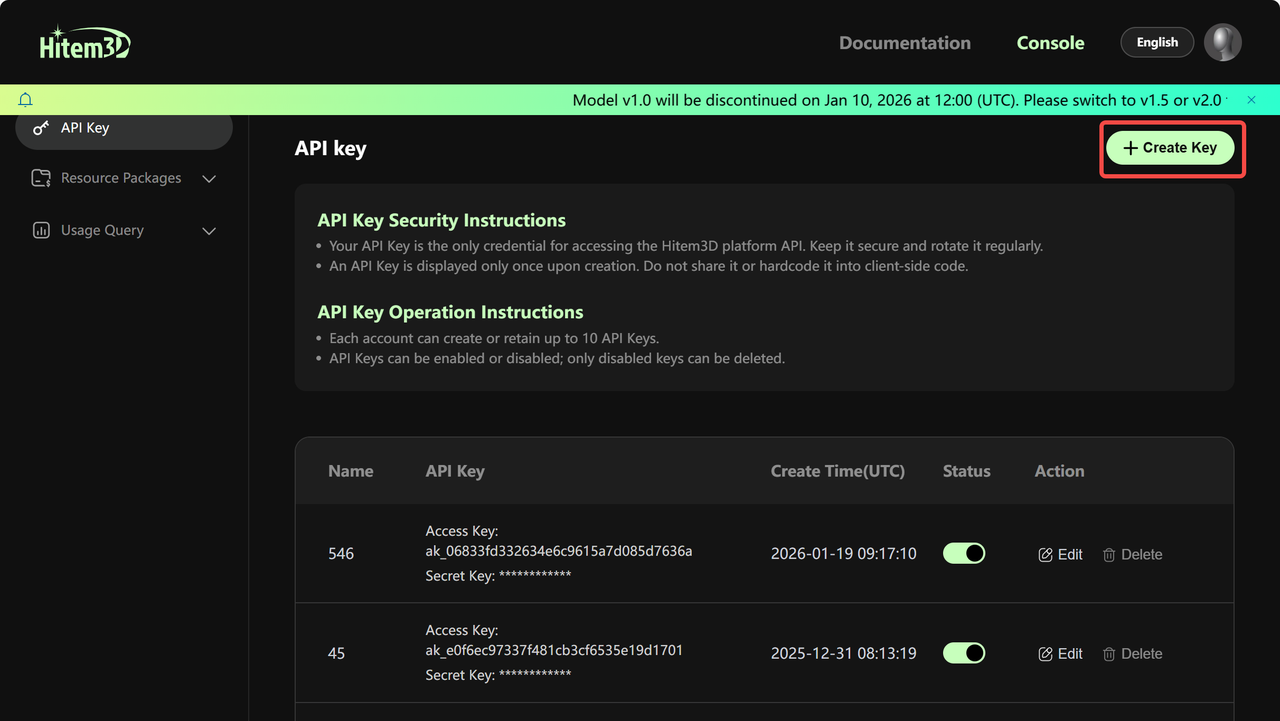
👉🏻https://platform.hitem3d.ai/console/apiKey
Click [Package Management] to check your current balance or purchase additional credits.
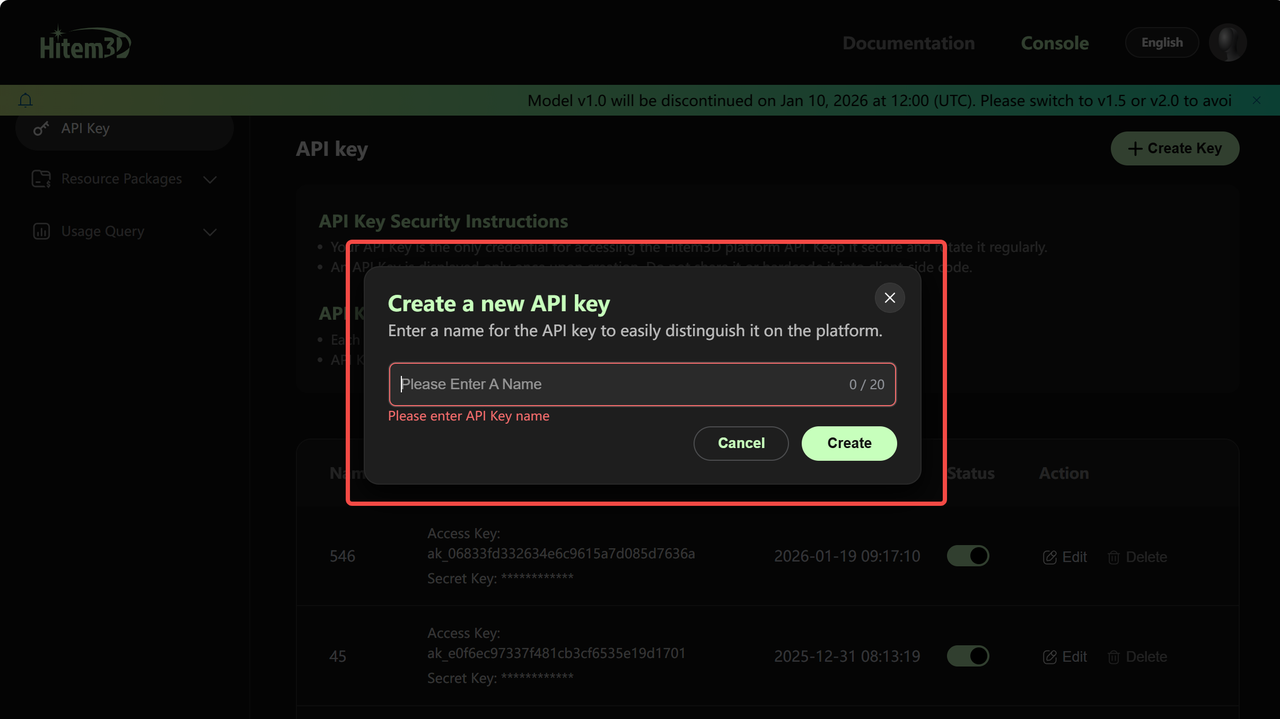
- Once logged in, click Create Key and provide a name for your new API key.
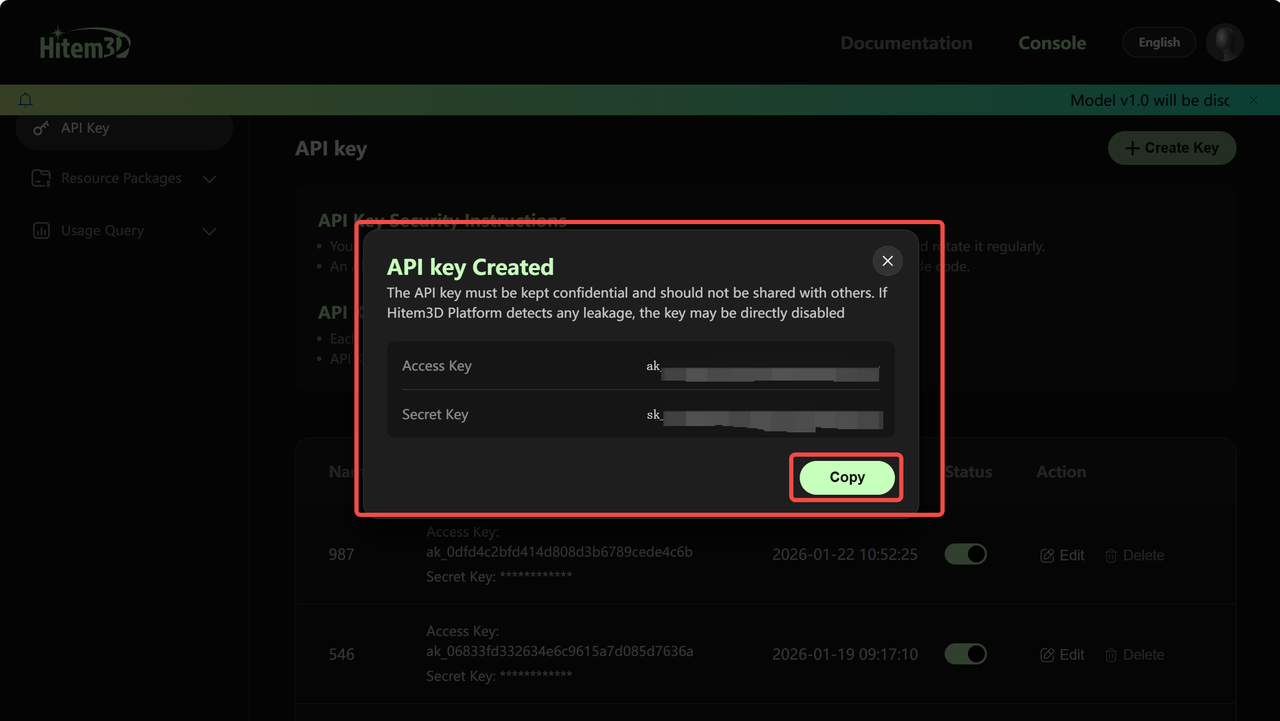
- After creating the key, the Hitem3D API Key will appear. Copy the API key separately, and return to the Blender plugin page.
- Paste the API key into the designated field in the Hitem3D panel, then click Confirm.
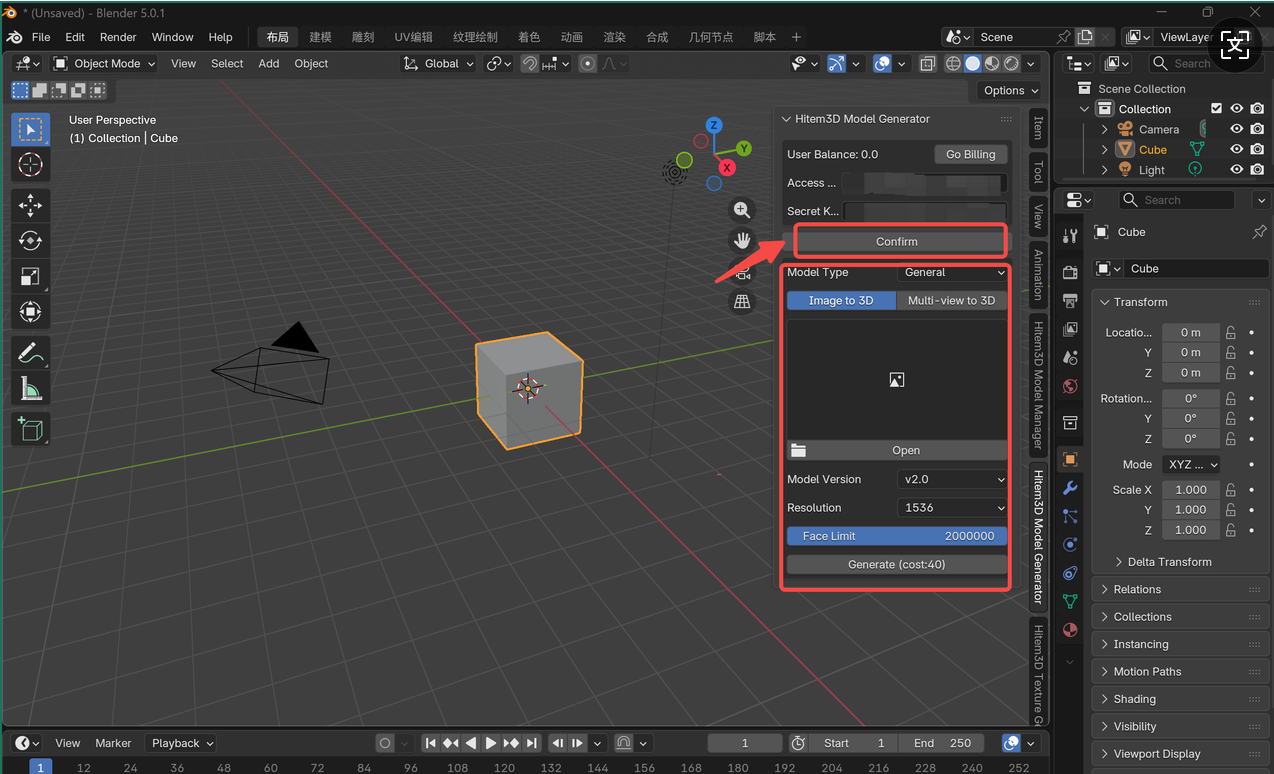
After confirming, the toolbar will appear, and you’ll be ready to start using the plugin!
Step 2:Generate AI-Based Geometry
After completing plugin authentication, you can start generating AI-powered geometry directly in Blender.
In the Hitem3D panel, select [Hitem3D Model Generator], then click Open to upload your reference image.
- Pro Tip: Use clear images with good lighting and minimal background clutter for better results.
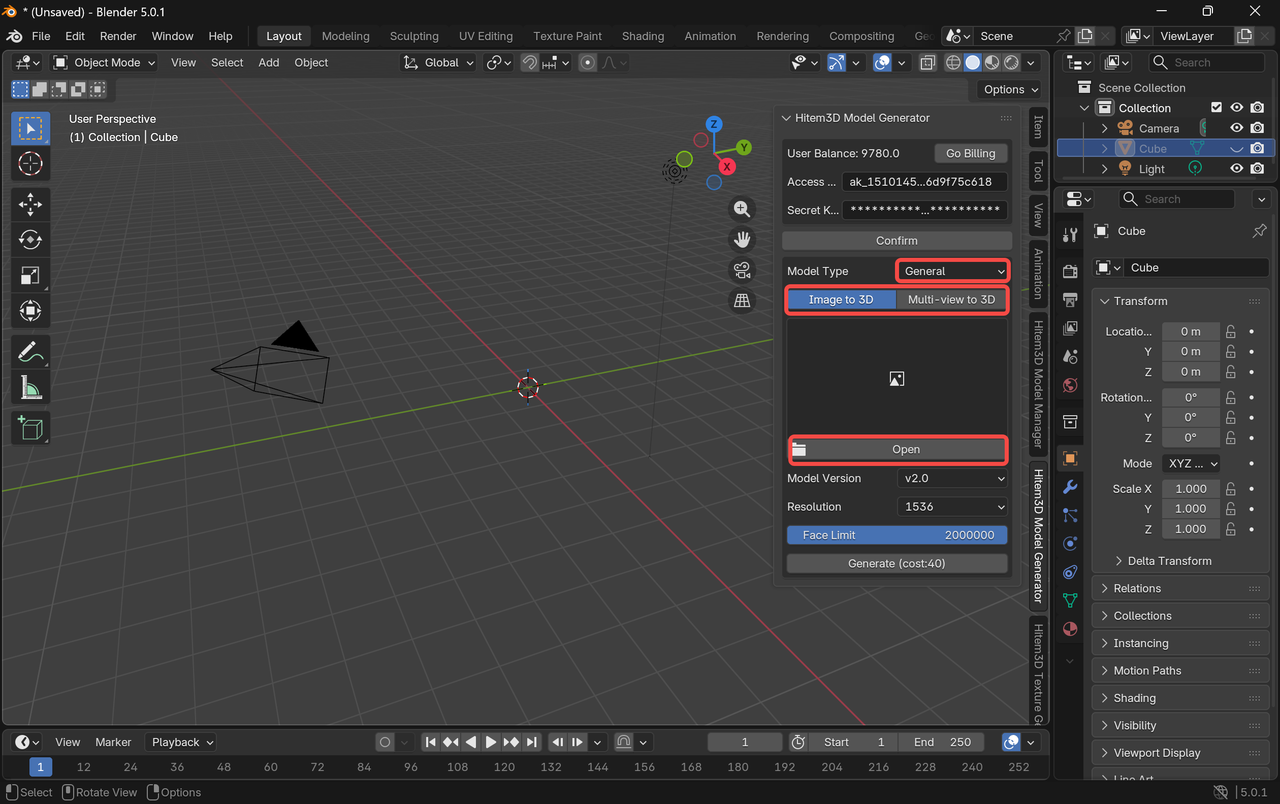
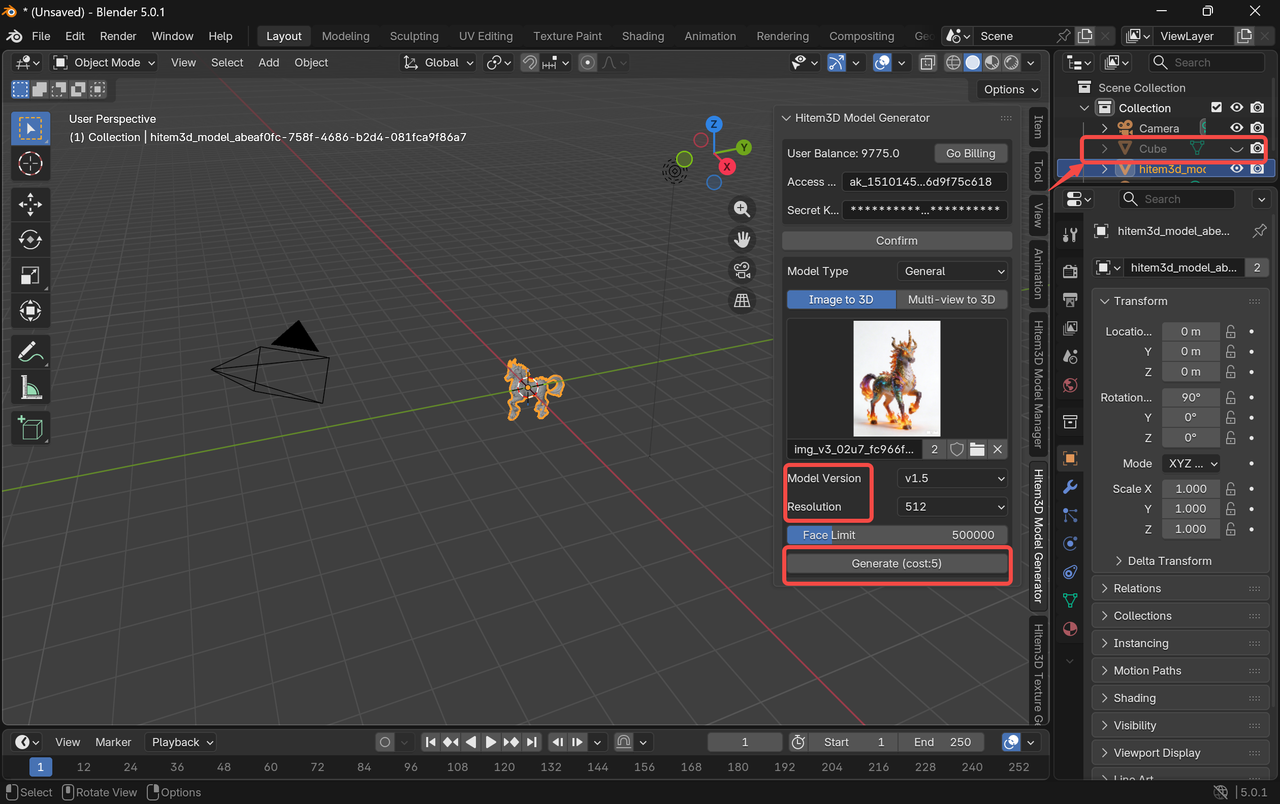
- Configure the generation settings as needed, then click “Generate.” Your image-to-3D result will appear directly in Blender.
- After closing the “Cube”, the model can be viewed.
Step 3:Generate Textures for the Model
- In the Hitem3D panel, select [Hitem3D Texture Generator].
Click Add Object to select the generated model, then click Generate.
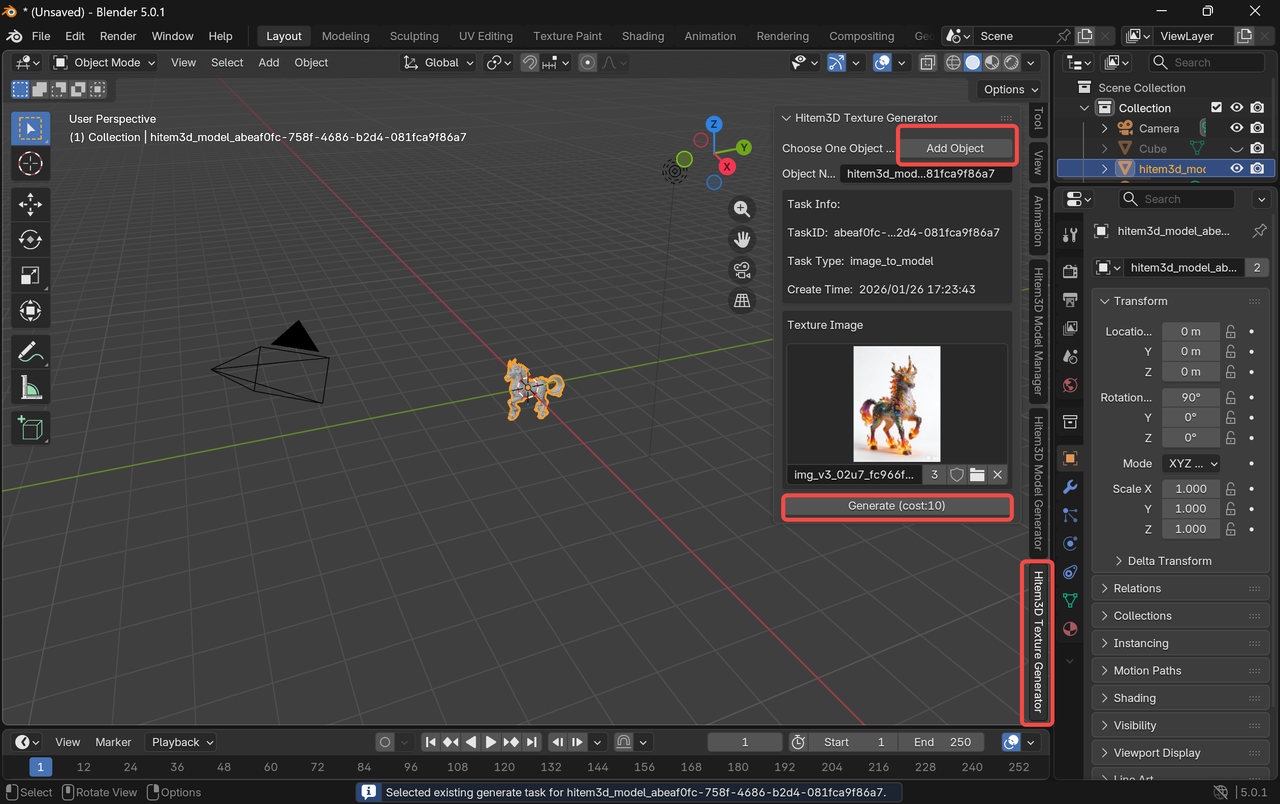
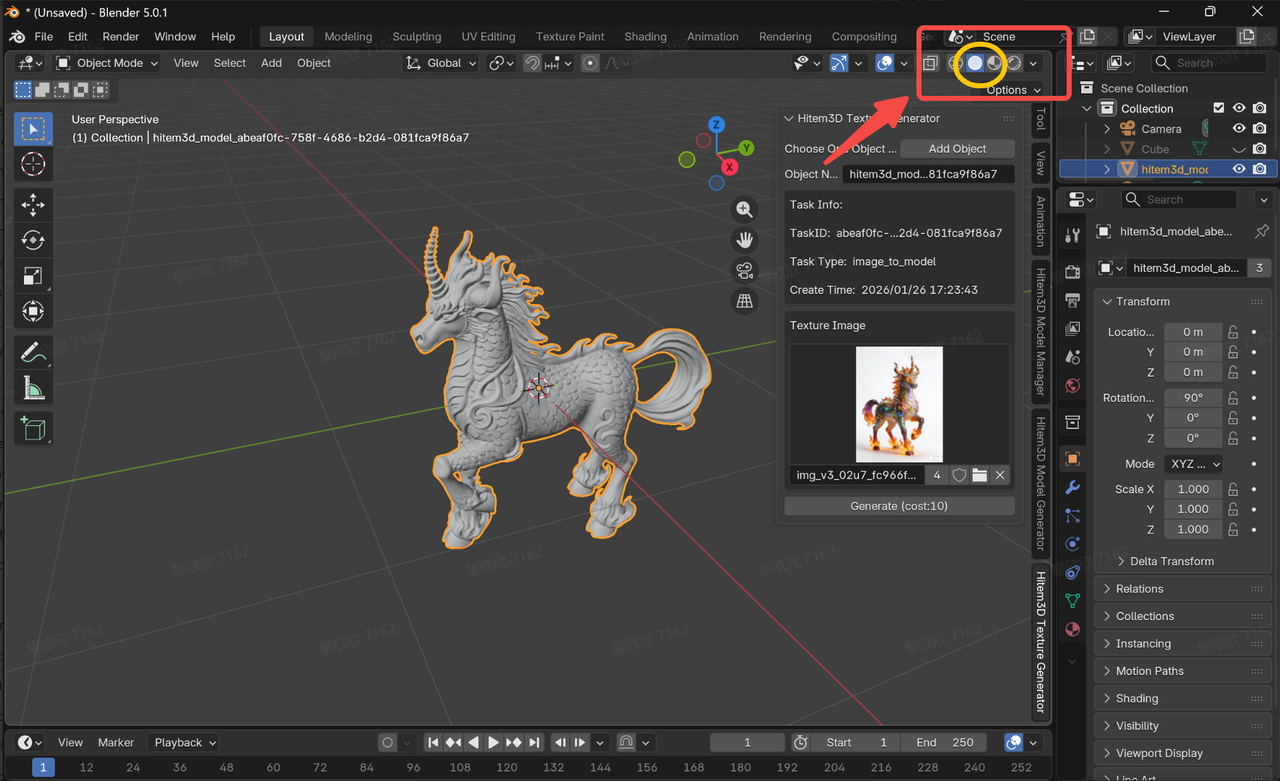
- The textured model will appear directly in Blender.
- You may need to manually enable the texture display to view the result.
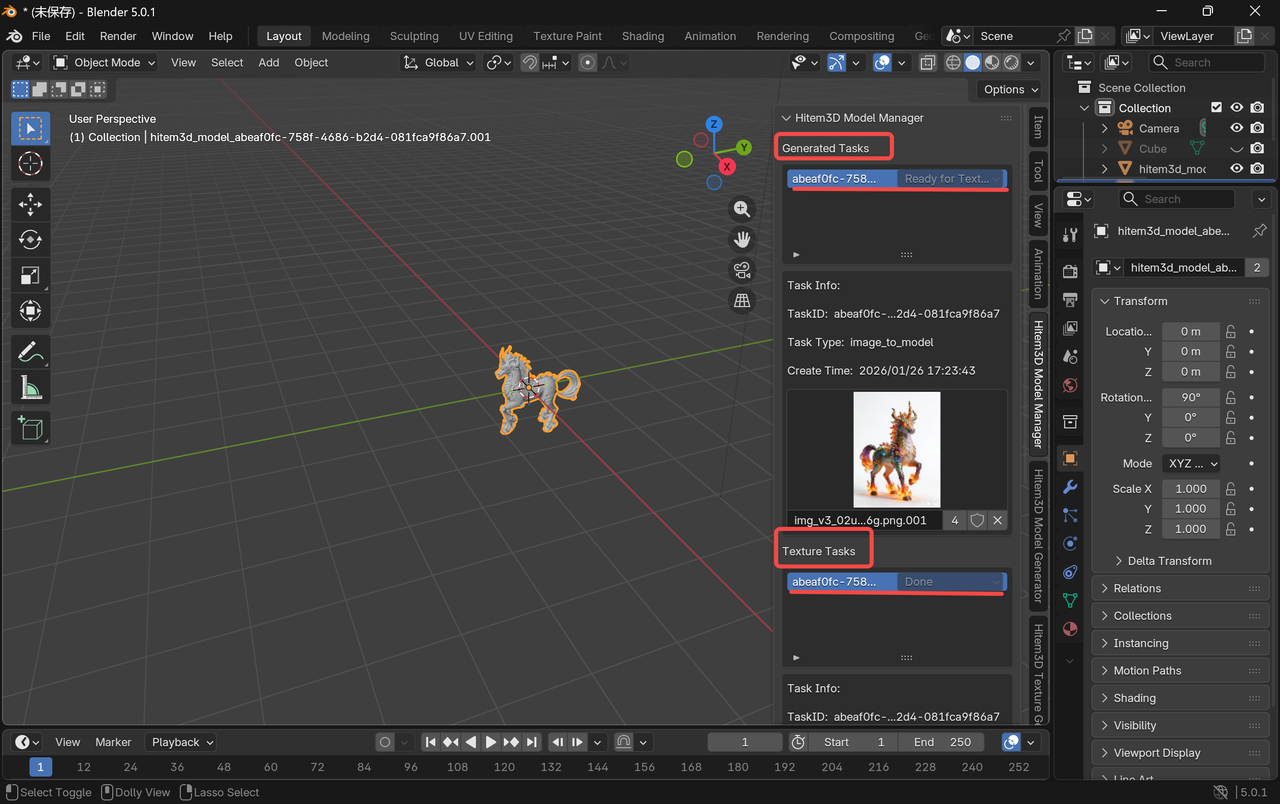
Step 4:Review Generated Models
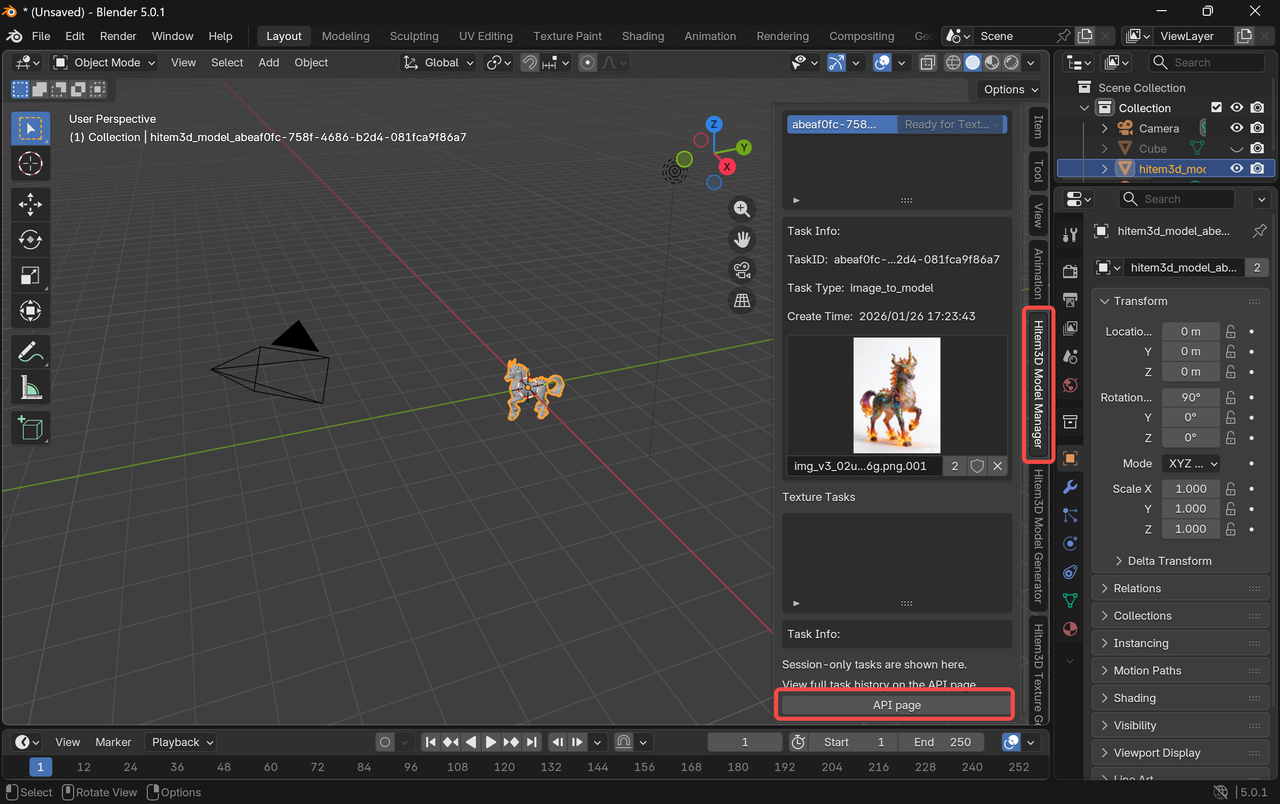
- In the Hitem3D panel, select [Hitem3D Model Manager].On the Generated Tasks page, you can monitor the generation progress.
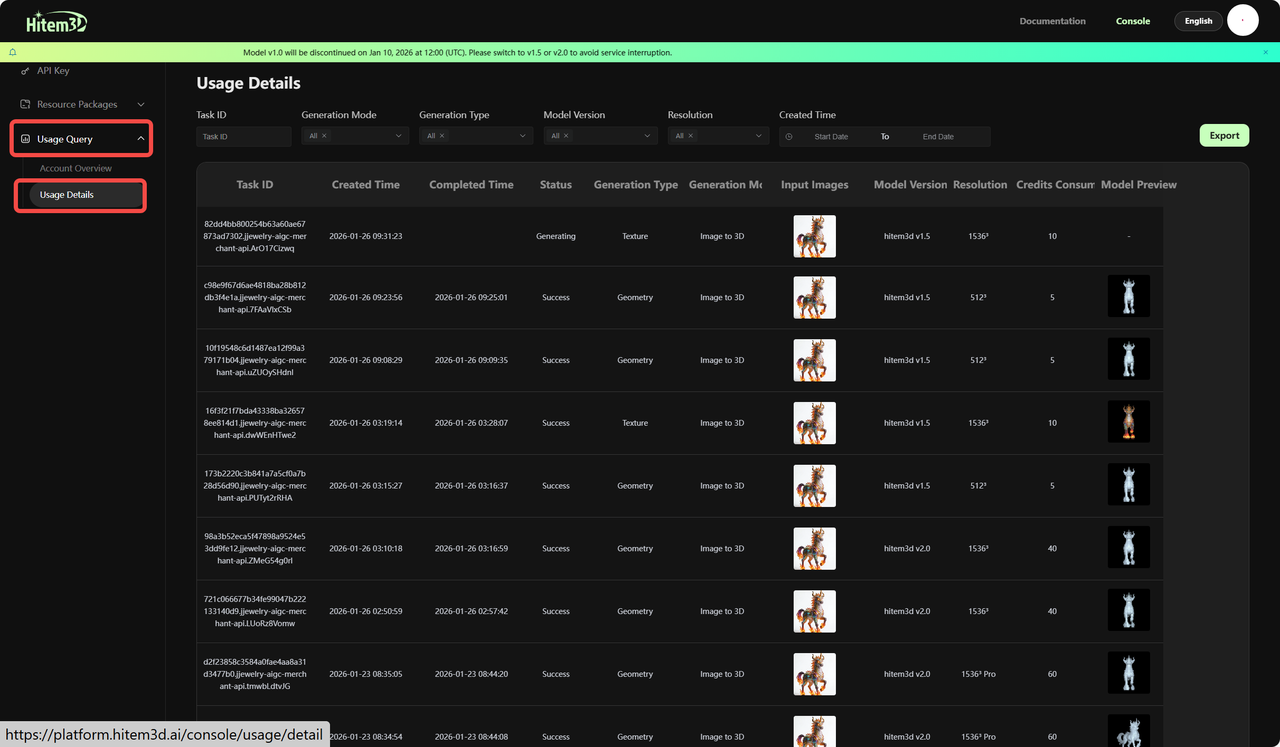
- In [Hitem3D Model Manager], click API Page to open a new browser page.
- Click Usage Query → Usage Details to view detailed records of your model generation history.
Advanced Tips for Better Results with Hitem3D
While Hitem3D allows you to generate 3D models quickly, achieving high-quality, production-ready starting assets often requires thoughtful input and refinement. The following best practices will help you get more consistent and realistic results.
Optimizing Image-to-3D Generation
When using Hitem3D’s image-to-3D workflow, input quality is critical.
Use high-quality reference images
Clear, well-lit images with sharp details lead to better geometry and textures.Remove or simplify backgrounds
Images with isolated subjects produce cleaner and more accurate models.Provide multiple views for complex objects
If available, using images from different angles helps the AI better understand structure and depth.Adjust model complexity settings
Higher polygon counts preserve more detail but require additional processing. Choose settings based on your target use case.
Troubleshooting Common Issues
Model Generation Fails
Verify that your API key is entered correctly
Check your remaining credit balance
Ensure a stable internet connection
Try simplifying your prompt or adjusting generation settings
Plugin Not Appearing in Blender
Confirm the plugin is properly installed and enabled
Restart Blender after installation
Check the Blender console for error messages
Unsatisfactory Model Quality
Use clearer and higher-quality reference images for image-to-3D generation
Experiment with different model versions or styles
Increase resolution or polygon count for higher detail
FAQ
Can I use Hitem3D-generated models for 3D printing or production use?
Yes, Hitem3D-generated models can be used for 3D printing. However, the generated results are intended to serve as base meshes, and production readiness may vary depending on your specific use case.
Note: For optimal results—especially in manufacturing, high-precision printing, animation, or real-time applications—additional manual steps such as geometry cleanup, mesh repair, retopology, or thickness adjustments may be required. These refinements are a normal part of professional 3D workflows and help ensure the final asset meets technical and quality standards.
Do I need prior Blender experience to use the Hitem3D plugin?
No prior Blender experience is required.
The Hitem3D Blender plugin is designed to simplify the creation process and make AI-powered 3D generation accessible to users of all skill levels. Core features are integrated directly into an intuitive panel, allowing beginners to generate models and textures with minimal setup, while still giving experienced Blender users full control for advanced refinement.
Is the Hitem3D Blender plugin free to use?
Yes, the plugin is free to download and install. However, certain features, such as API access, may require a subscription.
Credit Packages & Pricing
Notes:
- The Blender plugin consumes credits exclusively from your API credit package.
👉🏻https://platform.hitem3d.ai/console/apiKey
Click [Package Management] to check your current balance or purchase additional credits.- Credits are used for API calls and model generation
- Trial Package: Each account can claim only once. Valid for 7 days from the date of claim. Standard Package: Valid for 365 days from the date of claim
** Credit Consumption per Generation **
Geometry Generation
| Version | Feature | Resolution | Credits |
|---|---|---|---|
| v1.5 | Single Image / Multi-view to 3D | 512³ | 5 |
| v1.5 | Single Image / Multi-view to 3D | 1536³ | 40 |
| v1.5-portrait | Single Image / Multi-view to 3D | 1536³ | 40 |
| v2.0 | Single Image / Multi-view to 3D | 1536³ | 40 |
| v2.0 | Single Image / Multi-view to 3D | 1536³ Pro | 60 |
| v2.0-portrait | Single Image / Multi-view to 3D | 1536³ Pro | 40 |
| Version | Credits (Without PBR) | Credits (With PBR) |
|---|---|---|
| v1.5 | 10 (PBR enabled by default) | |
| v2.0 | 20 | 30 |
What version of Blender is required?
We recommend Blender 4.5.1 or higher for full compatibility with the plugin.Can I generate textures for existing geometry in Blender?
Yes! The plugin allows you to generate high-quality textures for your existing 3D models without the need for remeshing.Is the plugin compatible with macOS and Windows?
Yes, the Hitem3D Blender plugin works across major operating systems, including Windows and macOS.
Conclusion: Simplify Your 3D Workflow with Hitem3D
With the Hitem3D Blender plugin, you can seamlessly integrate AI-generated geometry and high-quality textures into your creative process. Whether you’re designing characters, environments, or props, the plugin provides a streamlined, all-in-one solution for accelerating early-stage creation directly inside Blender.
Reduce tool switching, iterate faster, and focus on creativity. Download the plugin today and experience a more efficient way to create in Blender.