Transforming a simple photo into a detailed 3D model is the promise of many AIs. But between approximate meshes and blurry textures, the result is often disappointing. So, what is Hitem3D 1.5 really worth, which promises ready-to-use 3D exports (STL/OBJ/GLB)? We pushed the tool to its limits: 512^3 vs 1536^3 Pro, single image vs multiview, Head mode… Spoiler: there are “wows” (the texture fineness is stunning), some limits (the mesh is dense!), and tips that make all the difference. 🔥

Hitem3D 1.5 interface: simple, “Create”-oriented, with history and resolution options. Click to see the full video.
🚀 Try Hitem3D now
Discover the app in 2 minutes: watch the video · open Hitem3D 1.5
In this summary
- Getting started & new features of 1.5
- Operation and interface
- Resolutions & modes
- From photo to printed model: my workflow
- Multiview shooting checklist
- Which mode to choose?
- Concrete tests: 8 use cases
- Case study: bust in Head mode
- Model quality & export
- Prepare the mesh for 3D printing
- Tips for better results
- Pricing & credits
- Quick comparison
- Frequently Asked Questions (FAQ)
- Conclusion & Verdict
Getting started & new features of 1.5
Compared to 1.0 (1024/1536 choice), version 1.5 brings: 512^3 (eco), 1024^3, 1536^3, 1536^3 Pro (max details) and a Head mode dedicated to faces. The big practical novelty is multiview reconstruction (2 to 4 photos) which improves 360° consistency.
Specifically, how does it work? The interface is minimalist, and that’s a good thing. We focus on the essential: creating.
Operation and interface
🖱️ Key tabs
- 🖼️ Create → Image to 3D: upload 1 image, choose resolution, texture option, then generate.
- 🧊 Create → Multiview to 3D: import 2 to 4 views (front/back/left/right) for more reliable geometry.
- 🕐 History: follow queue, restart generations (3 free retries).
- 💬 Community: blog/Discord for tutorials & feedback.
Once the image is imported, the most important choice arises: which resolution and which mode to use? Each option has a direct impact on the result, the credit cost, and the waiting time. Here’s a quick guide to help you find your way.
Resolutions & modes (when to choose what)
| Mode | Description |
|---|---|
| 🌿 512^3 (eco) | Very fast mockups |
| 🎯 1024^3 | Good balance |
| 📺 1536^3 | Fine details |
| ⭐ 1536^3 Pro | Maximum precision |
| 👤 Head | Portraits/busts |
| 📷 Multiview | 360° consistency |
Knowing which mode to choose is one thing, but getting a perfect result on the first try is another. After several dozen generations, I’ve developed a workflow that gives me the best results, from shooting to printing.
From photo to printed model: my workflow
- 📷 Shooting: neutral background, diffuse light, centered subject. In multiview, maintain the same distance and exposure.
- 🖼️ Mode choice: portrait → Head; detailed objects → 1536^3/1536^3 Pro; quick mockup → 512^3/1024^3.
- ⚙️ Generation: launch a first attempt then use the 3 retries to correct (hands, accessories, back…).
- 📤 Export: STL for 3D printing; OBJ/FBX for DCC; GLB for the web.
- 🧊 Cleaning: Blender → Shade Smooth, Decimate (if needed), watertight check.
- 🖨️ Printing: slicer (FDM/resin), orient to limit supports.
The most crucial point of this workflow, especially for 360° 3D, remains the quality of the photos. For multiview, the adage “garbage in, garbage out” has never been truer. Here is my checklist to remember everything.
Multiview shooting checklist
📋 5 points to respect
- ☑️ 4 sharp views: front, back, left, right (eye level).
- 💡 Soft and uniform light; avoid reflections.
- ⚖️ Same white balance/exposure for all photos.
- 📏 Crop tightly, without cutting key elements.
- ⚡ Simple background to help the AI with contours.
In summary, the choice of mode really depends on your final project. I’ve compiled this table to help you decide at a glance.
Which mode to choose according to your objective?
| Mode | Recommended use | Expected rendering | Cost/Time* (indicative) |
|---|---|---|---|
| 512^3 | Quick mockup, idea testing | Global shapes | Very low / short |
| 1024^3 | Simple objects, toys, props | Correct details | Low / short–medium |
| 1536^3 | Characters, fur, folds | Fine details | Medium / medium |
| 1536^3 Pro | Hero assets, portraits | Maximum precision | Higher / medium–long |
| Head | Busts and faces | Optimized resemblance | Medium / medium |
| Multiview | 360° objects/characters | Consistent geometry | Depending on resolution / medium |
Values vary depending on server load and updates.
Now that we’ve covered the theory, let’s move on to practice! Nothing beats concrete examples to judge quality. I subjected Hitem3D to a series of varied images, from complex figurines to portraits, to see where it excels… and where it struggles.
Concrete tests: 8 use cases
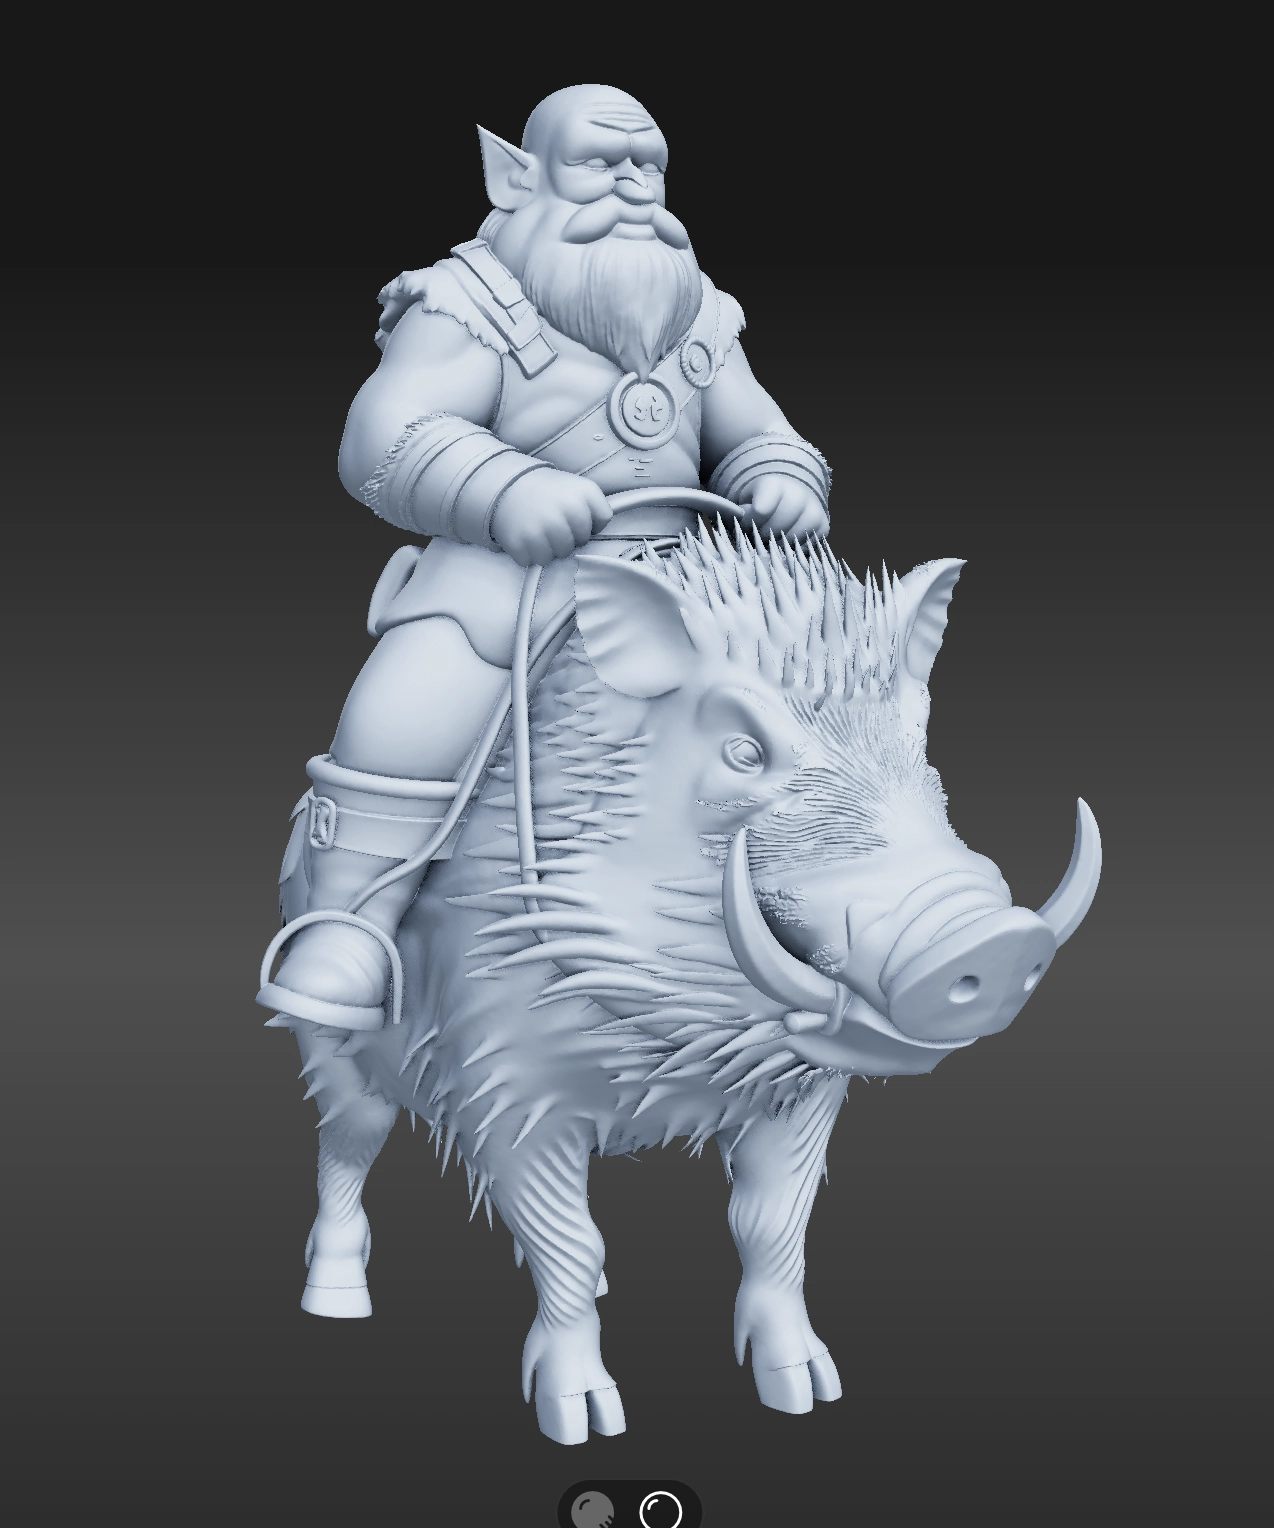
Figure 1 — Dwarf on boar: the increase in resolution is obvious. Multiview brings crucial details like the missing tail and better fur (see the test at 6:42).
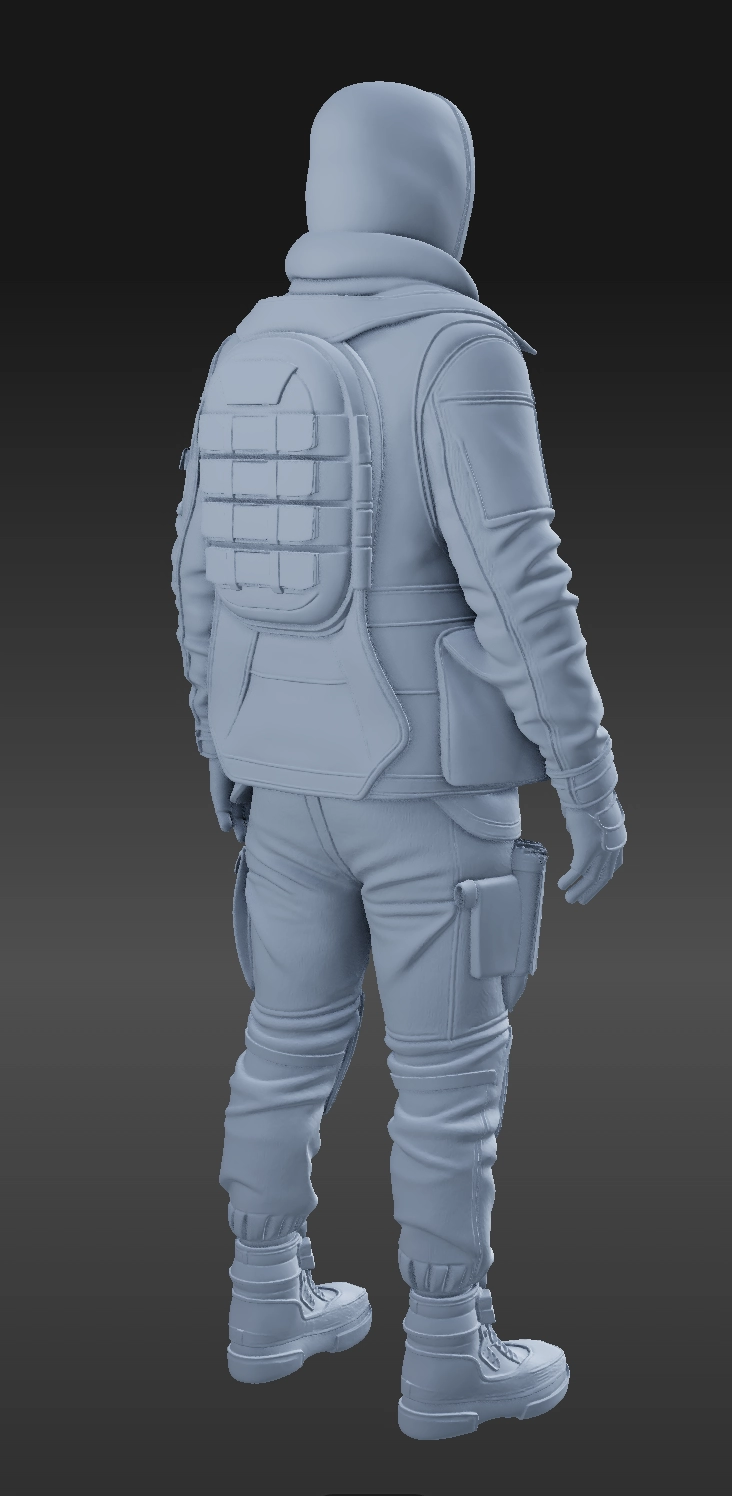
Figure 2 — Video game character: multiview in 1536^3; edits and texture OK, export in Blender.
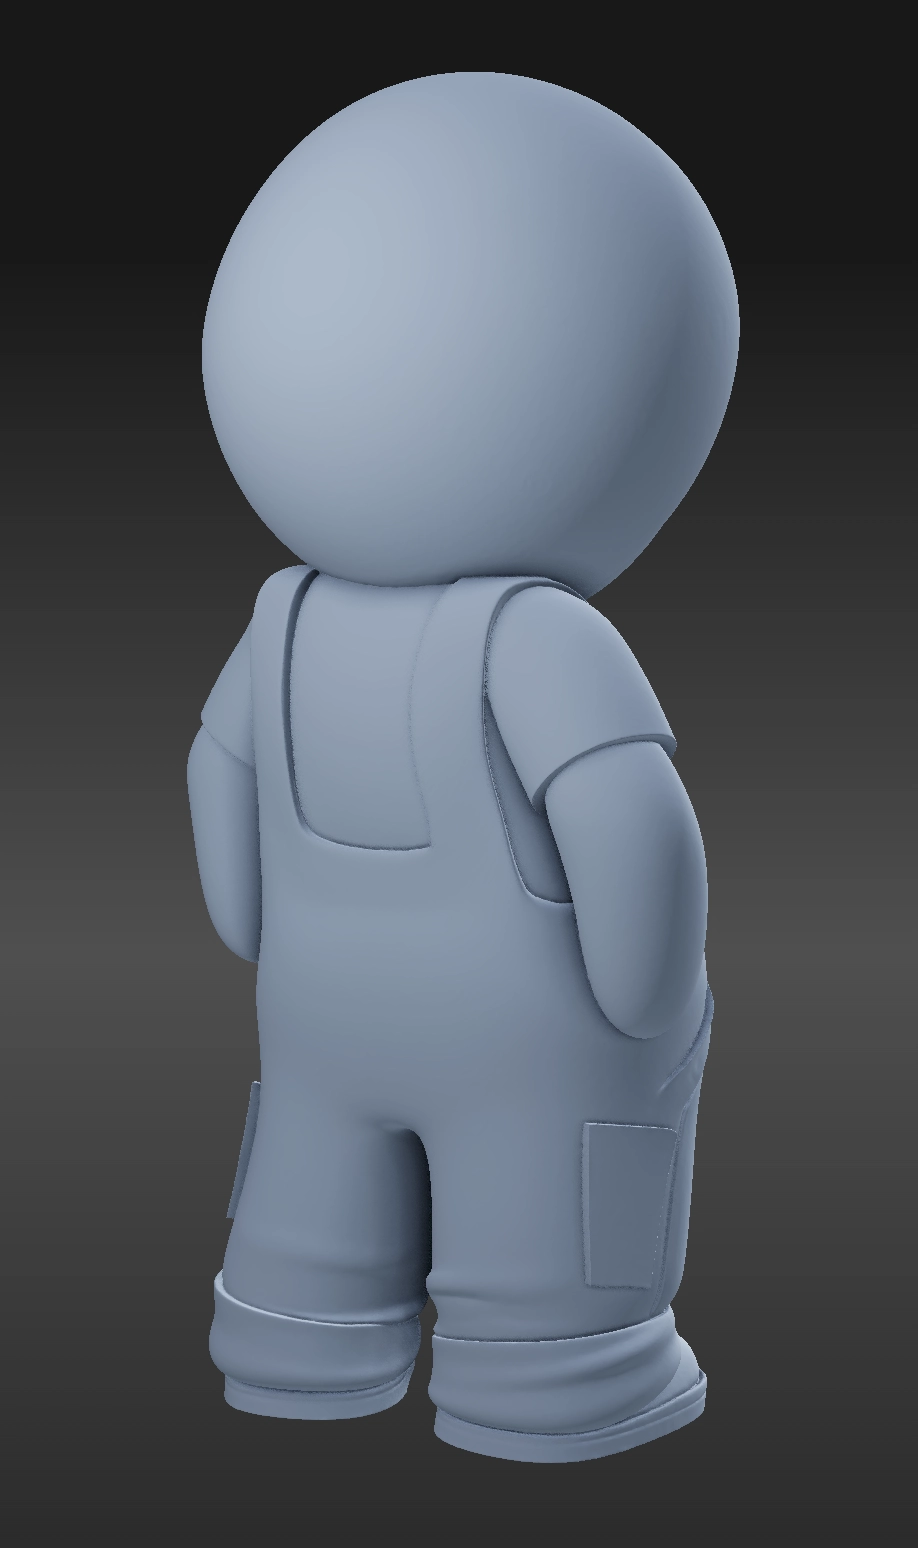
Figure 3 — Tchoupi-type Mascot (single image): Hitem3D correctly guesses the back and remains clean in 1536^3 Pro; Meshy gave an inconsistent back.
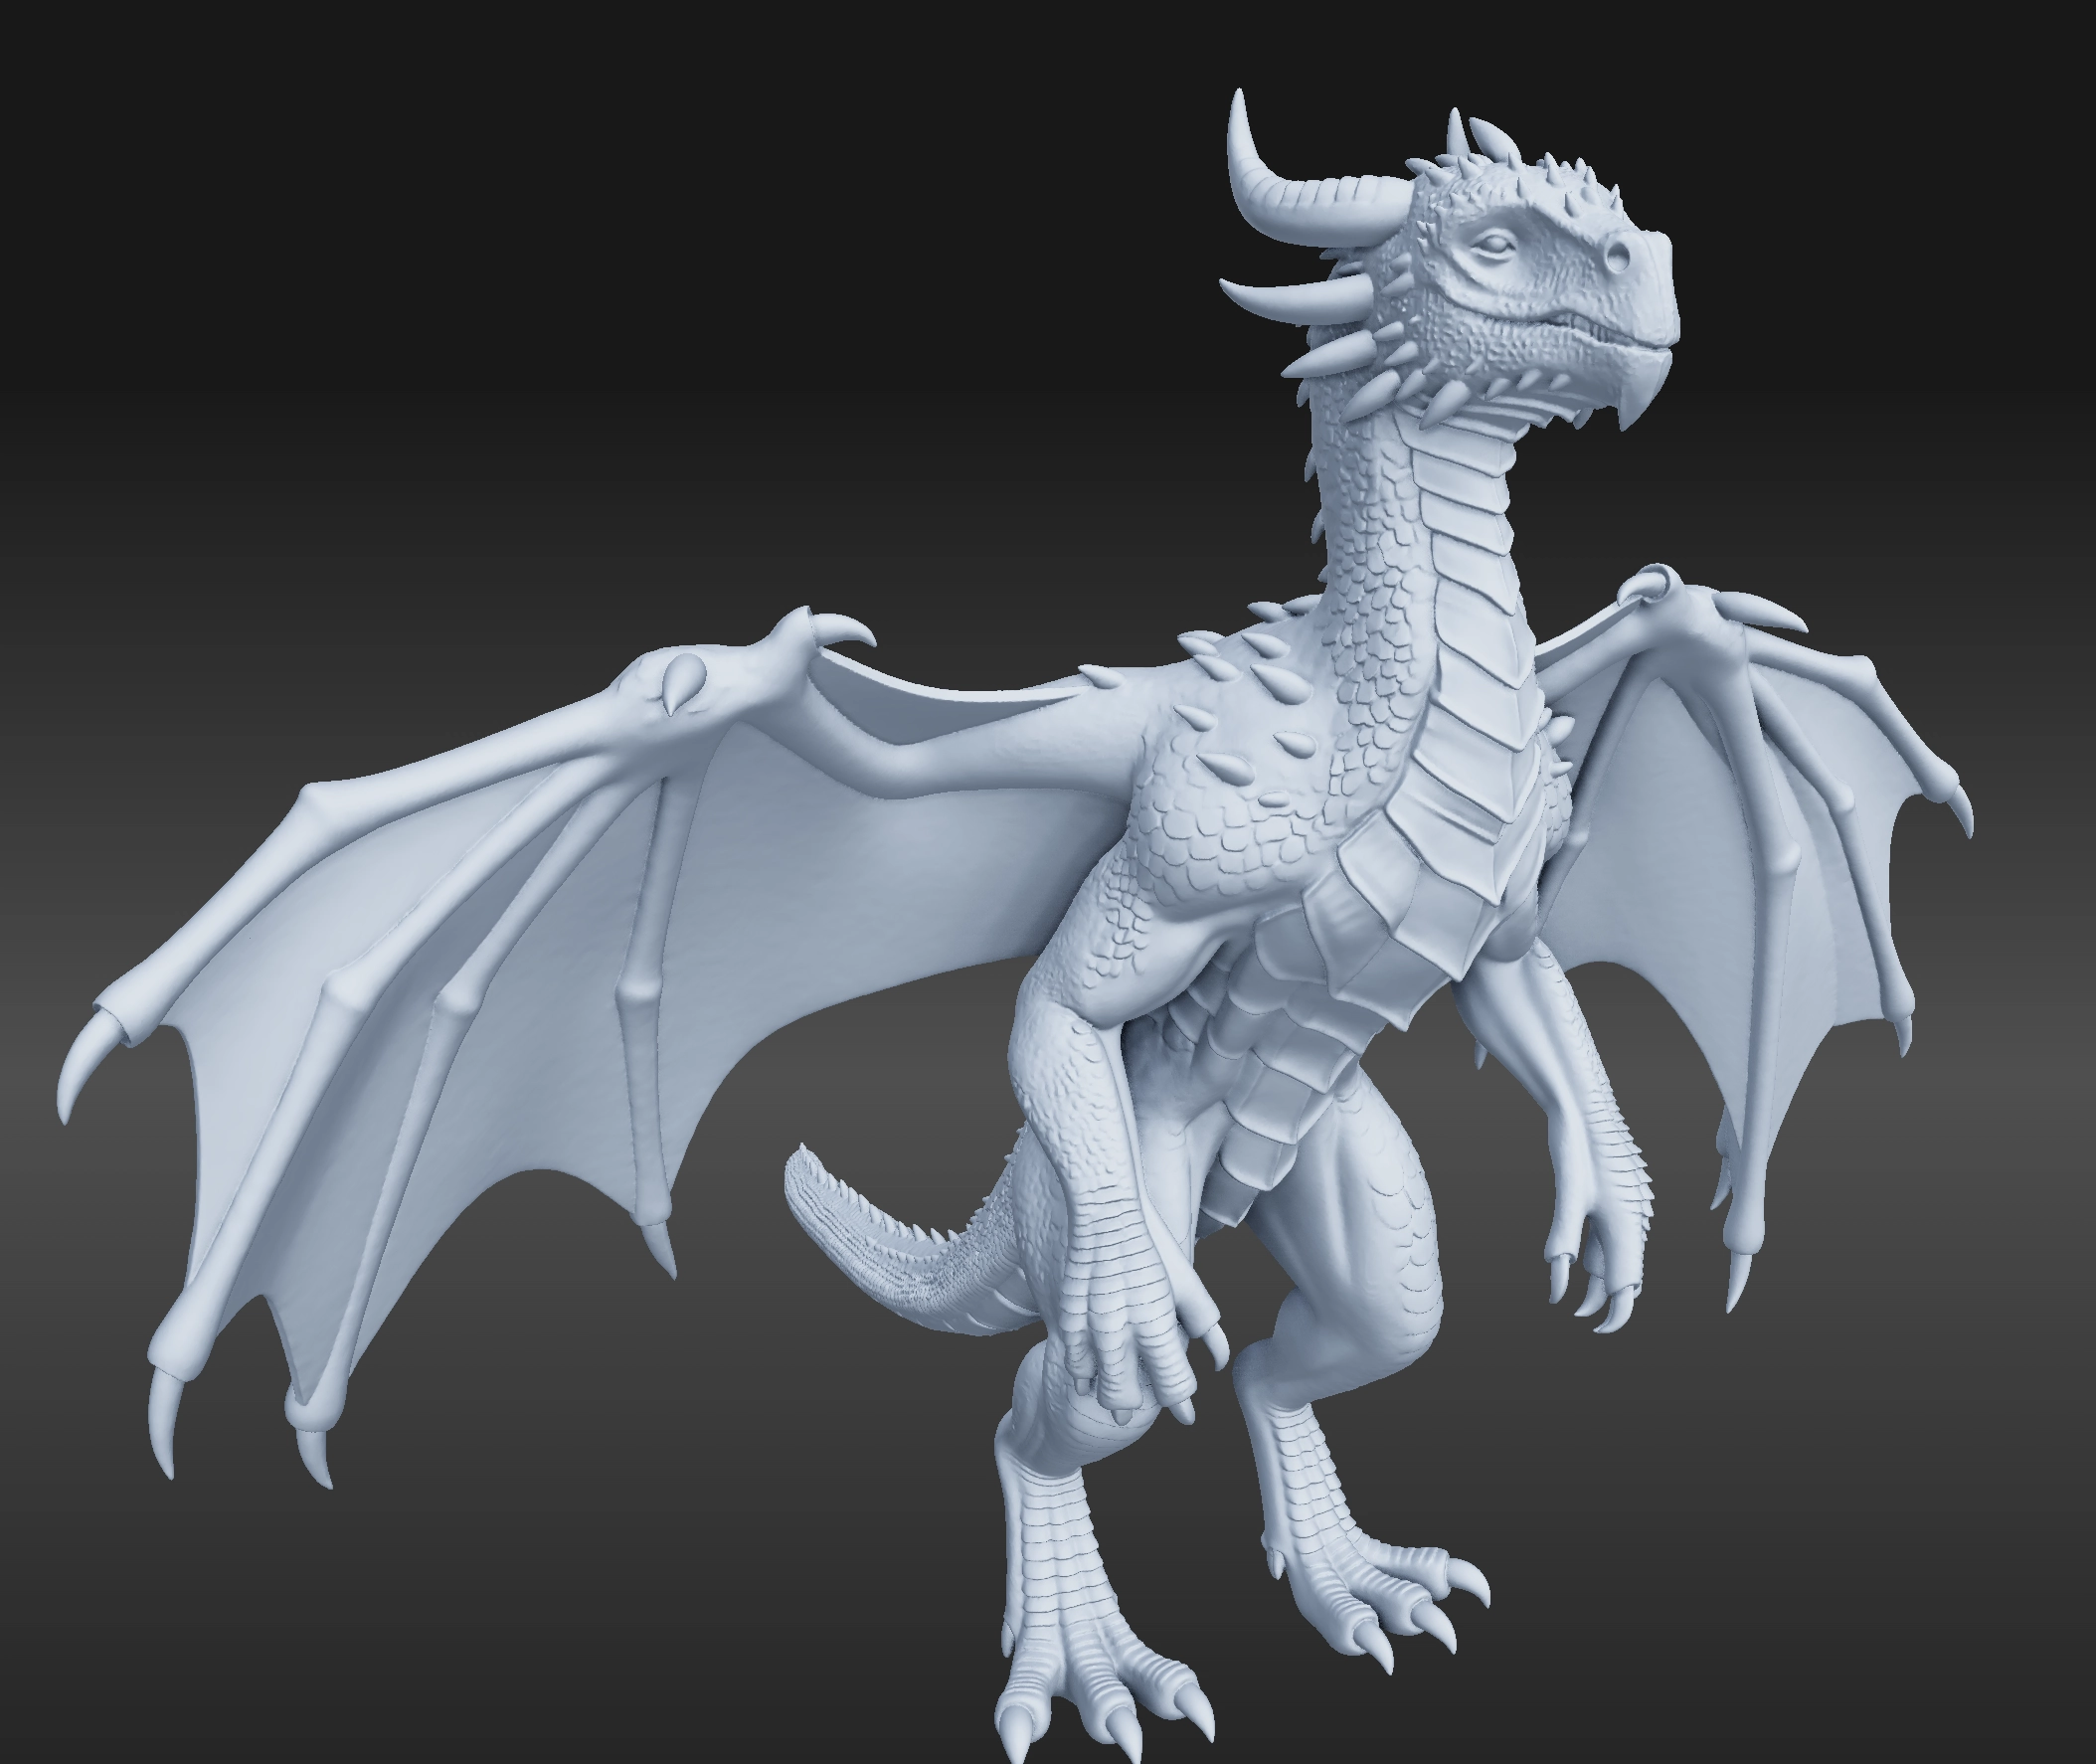
Figure 4 — Dragon (single image, 1536^3 Pro): very sharp surface details.
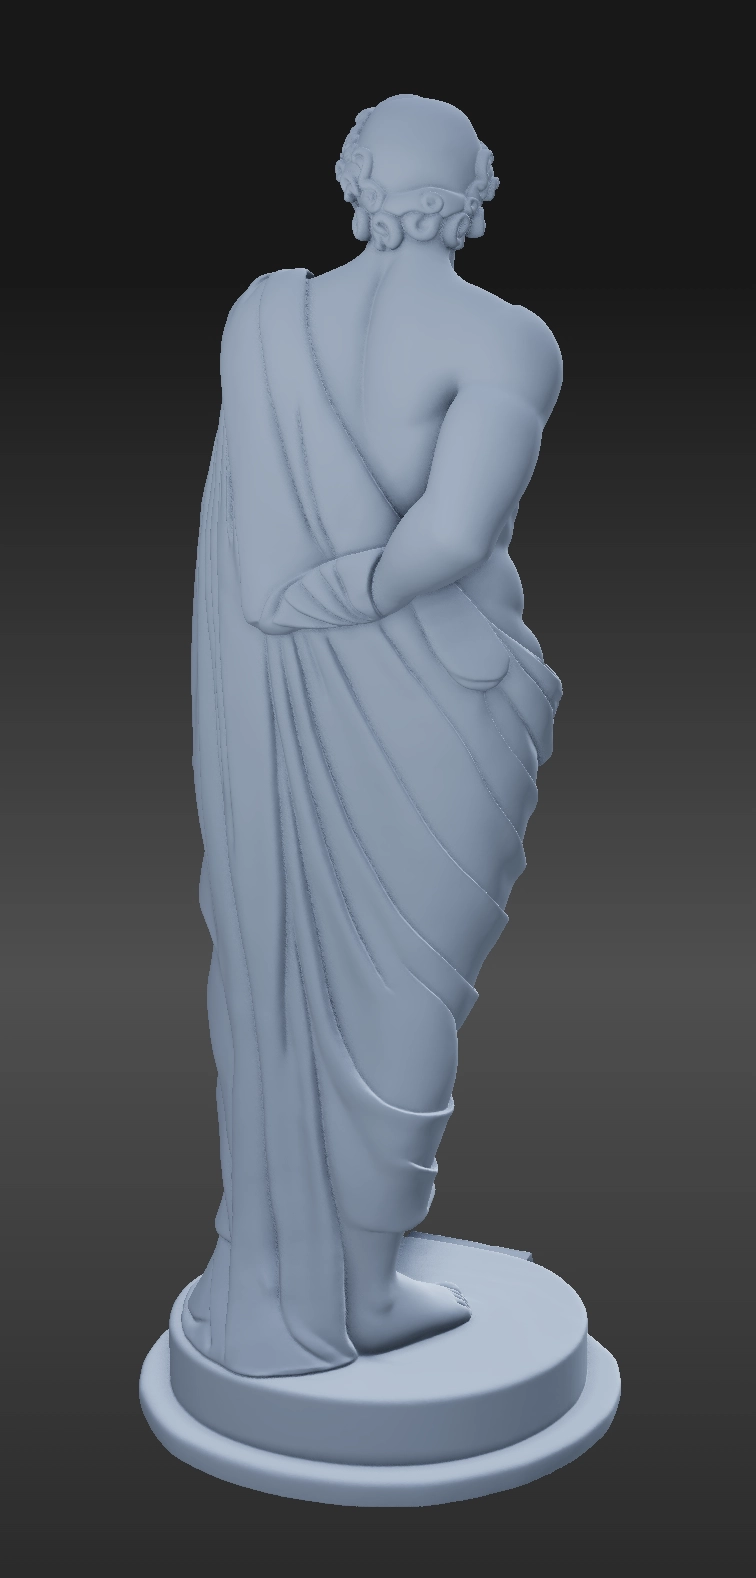
Figure 5 — Statue (single image): 2–3 free retries improve the logic (hand hidden under drapery).
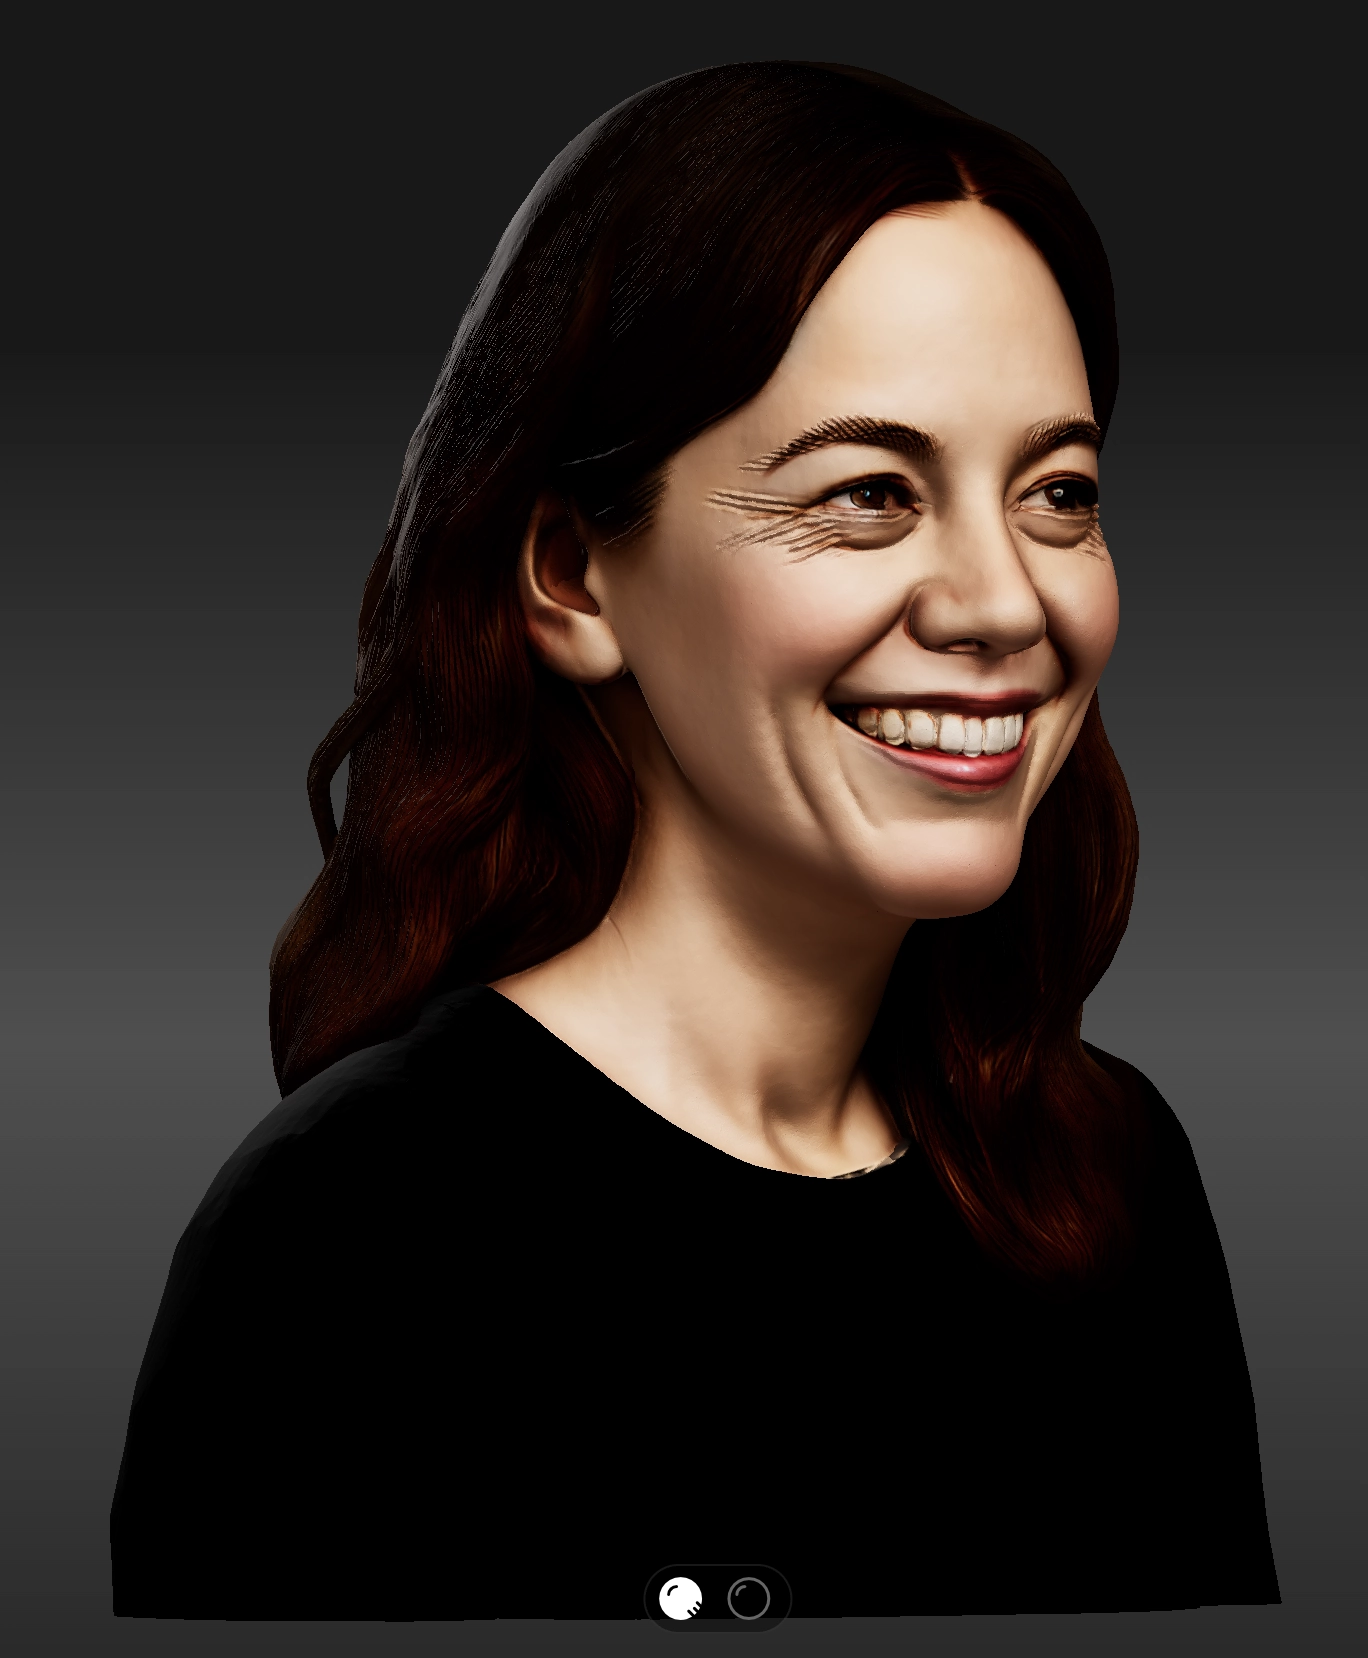
Figure 6 — Head Mode: portrait with texture, convincing resemblance.
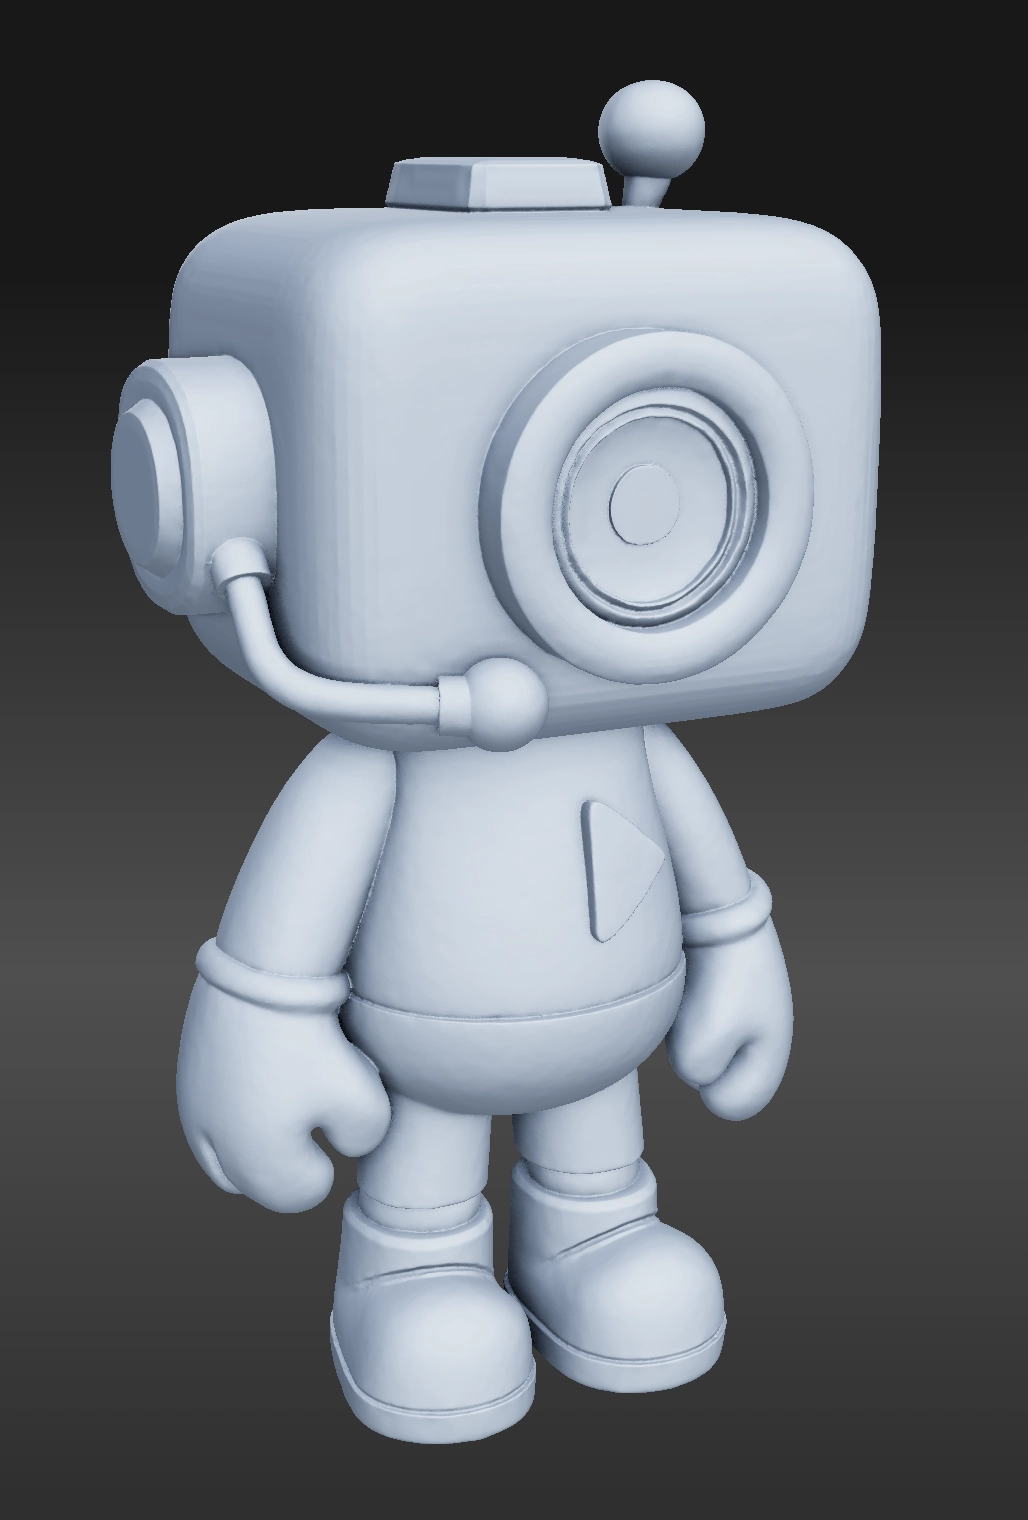
Figure 7 — Robot: multiview in 1024^3/1536^3, clean geometry, ready to print.
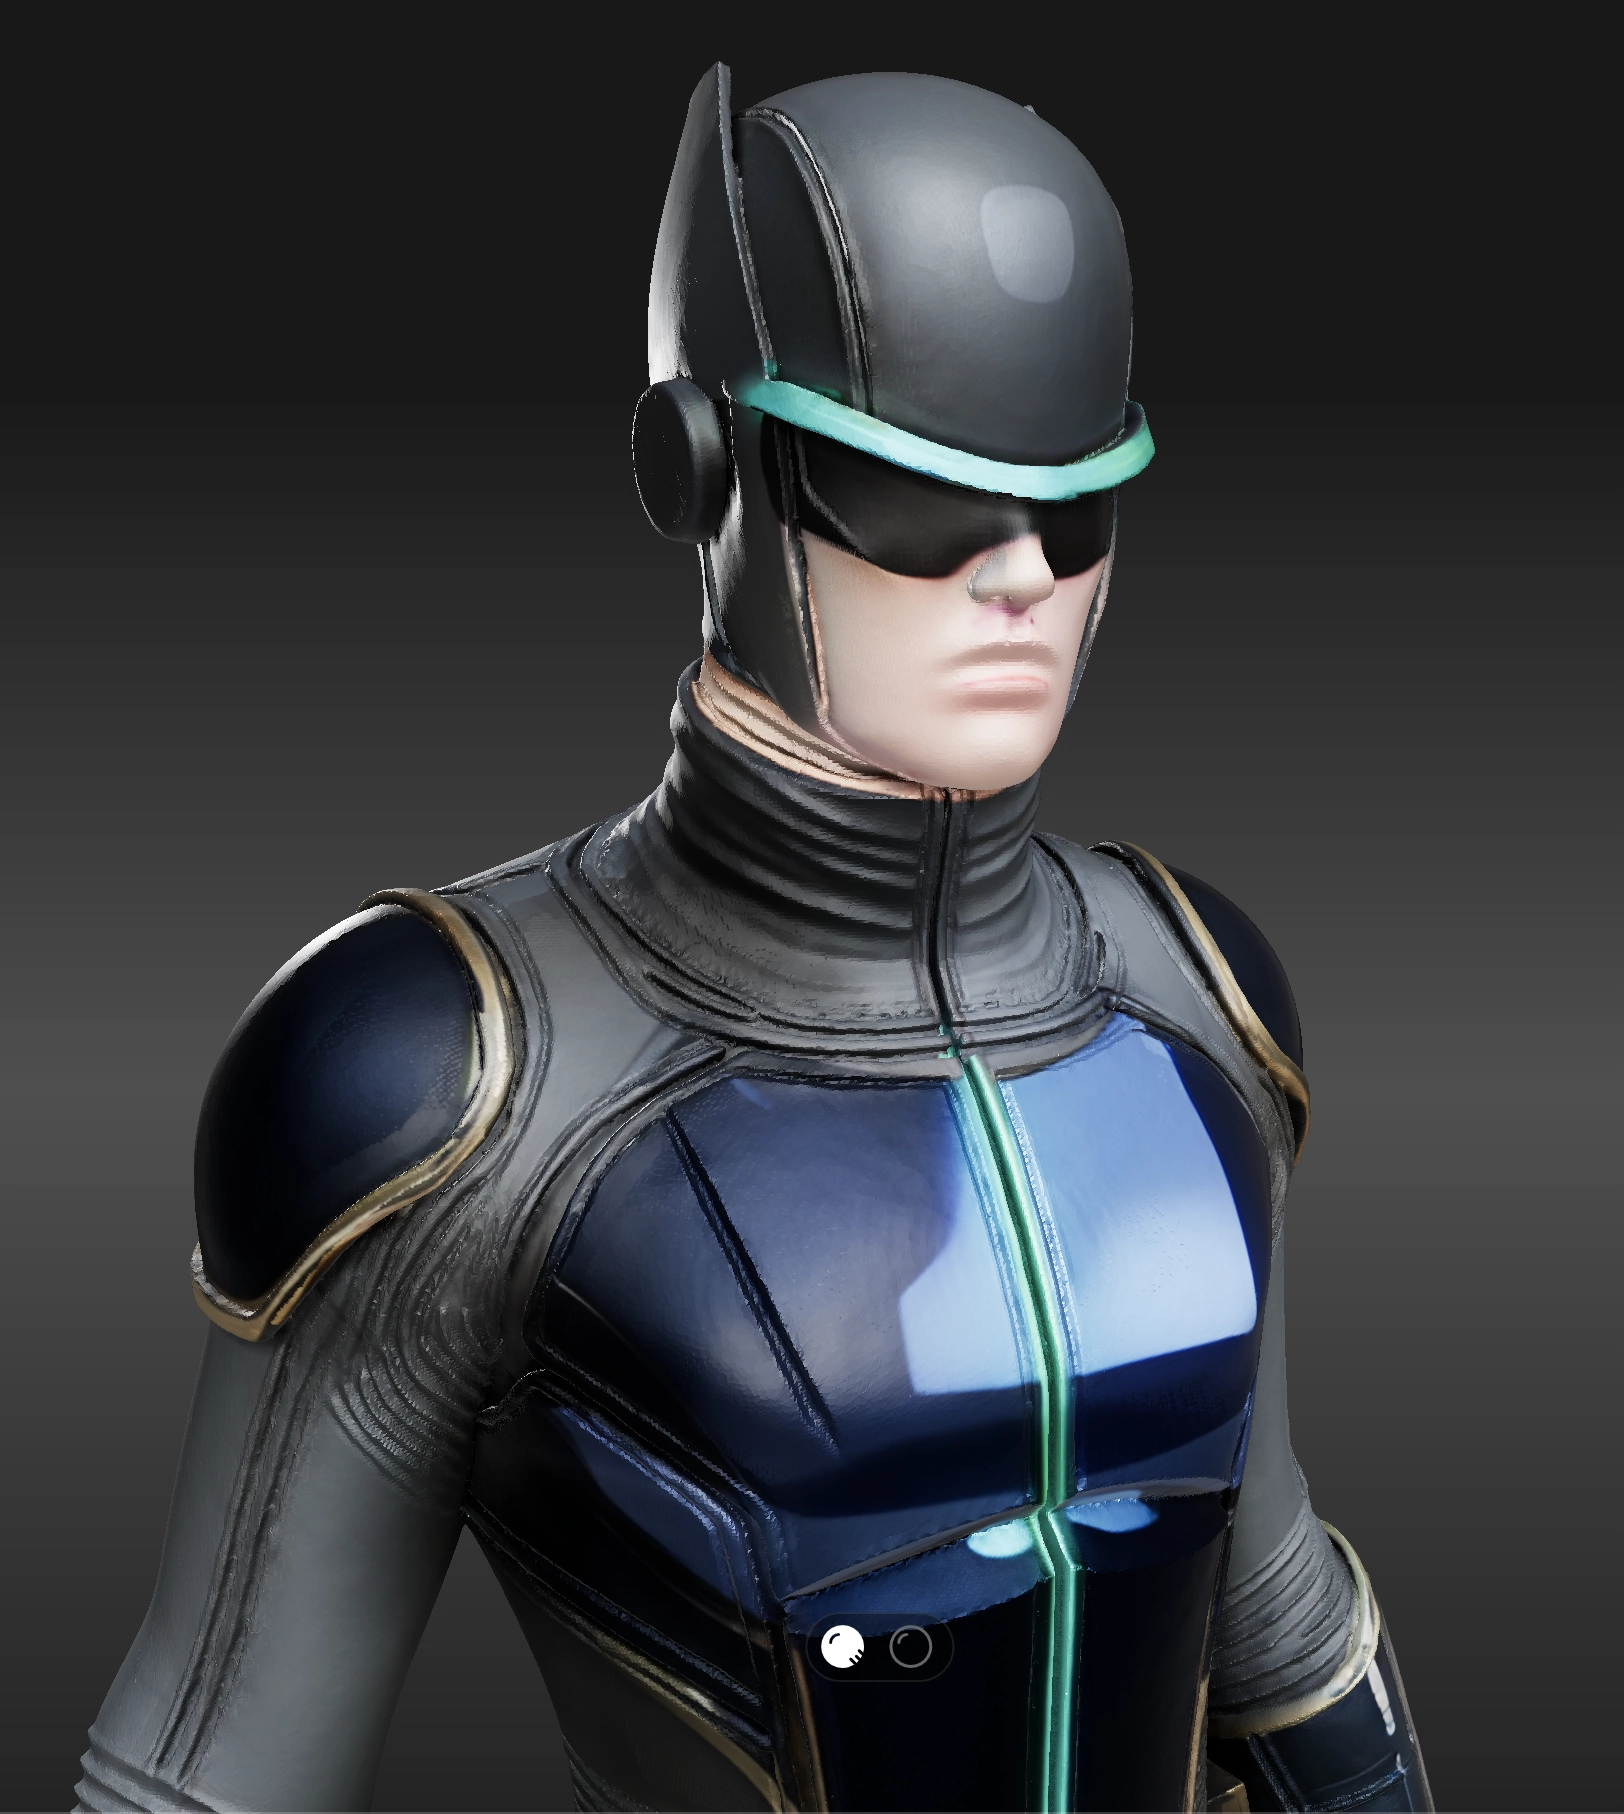
*Figure 8 — Superhero (4 views): a parasitic reflection on the visor on the 1st attempt, corrected via retry.*
The test that most impressed me was undoubtedly the ‘Tchoupi’ mascot. I was skeptical: with a single front image, AIs generally invent a flat or completely inconsistent back. Here, Hitem3D managed to generate a credible and volumetric back on the first try. It was at this moment that I realized the tool was not just a gadget, but a real aid to creation.
In summary: For complex objects, multiview in 1536^3 Pro mode offers the best fidelity. For simpler cases or to guess a hidden face, the AI performs surprisingly well with a single image, especially by using the free retries.
Case study: bust in “Head mode”
One of the most promising modes is “Head” mode, specially trained for faces. I wanted to push it to its limits with a practical case: obtaining a realistic bust from 2 photos (front/profile). I chose Head in 1536^3 with texture. First render already convincing; a retry corrected a lock of hair and the volume of the ear. Export in OBJ + textures, minor color retouching in Blender, then STL version for resin.
- 👤 Photos: neutral face, soft light, plain background.
- ✨ Generation: Head 1536^3 → 1 retry for the ear.
- 📤 Export: OBJ (texture) for web display, STL (no texture) for printing.
- 💧 Printing: 0.05 mm resin, light supports, 45° orientation.
Model quality & export
🛡️ Quality & consistency
Surface details (hairs, folds, small reliefs) are the major asset, especially in 1536^3/1536^3 Pro. Multiview stabilizes the geometry (boar’s tail, backpack, robot volumes). And the free retries (x3) often correct inconsistencies from a first attempt.
Prepare the mesh for 3D printing (FDM & resin)
🧊 Quick workflow before slicing
- 💧 Watertightness: check for holes (Blender: 3D-Print Toolbox).
- 🗜️ Density: if necessary, Decimate to lighten the mesh.
- ↔️ Orientation: place the model to limit visible supports.
- 🛠️ Supports: FDM → 50–60° angle; resin → thin supports, pay attention to protruding details.
- 🎨 Finishing: FDM → primer/smoothing; resin → post-curing and light wet sanding.
Tips for better results
💡 Maker tips for better results
- 🔄 Use the 3 free retries to push the AI to correct (back logic, accessories, hands…).
- 📚 Prefer 1536^3/1536^3 Pro for subjects with micro-details (fur, hair, fine folds).
- 📷 In multiview, provide well-framed views (front/back/left/right); avoid overly strong specular reflections.
- 🧊 For 3D printing, go through your slicer, check watertightness, and possibly reduce mesh density.
- 🔨 For game/animation, plan retopo + UV in Blender before rigging.
Pricing & credits: which plan to choose?
Three typical formulas: Free (for testing), Pro (≈ $20 / month, the best ratio for regular creators), Max (≈ $40 / month for large volumes). Note: the exact cost of multiview/tex may evolve — in my tests, 1536^3 Pro is the most credit-intensive but the cleanest.
Quick comparison: Hitem3D vs Meshy vs Tripo3D
| Characteristic | Hitem3D 1.5 | Meshy | Tripo3D |
|---|---|---|---|
| Strengths | Surface details, 1536^3 Pro, Head, multiview | Speed, simplicity | Consistency of certain geometries |
| Real case | Mascot: clean back guessed | Mascot: inconsistent back | Good on circular symmetries (depending on case) |
| Export for 3D printing | STL/OBJ/FBX/GLB | Yes | Yes |
| To watch out for | Queues, dense meshes | Cleaning often necessary | — |
Frequently Asked Questions (FAQ)
Can I use AI-generated images (Midjourney, etc.)?
Yes, absolutely! Most of my tests (the dwarf, the dragon…) were done with AI-generated images. As long as the image is sharp, well-defined, and the subject is clear, Hitem3D performs very well.
Is the 3D mesh directly usable for animation (rigging)?
No, not directly. The generated mesh is very dense (we’re talking hundreds of thousands of polygons) and is not optimized for deformation. It’s an excellent base for sculpting or 3D printing, but for animation, a “retopology” step in software like Blender is essential to create a lighter and cleaner mesh.
What is the difference with photogrammetry software?
Photogrammetry (as with Polycam or RealityCapture) recreates an object from dozens, even hundreds of photos of the same real object. It is very precise but requires many photos. Hitem3D is different: it “interprets” one or a few images to create a 3D model. It can guess hidden parts, which photogrammetry cannot do. It’s more of a creative tool than a pure scanning tool.
How long does it take for a 1536^3 Pro generation?
This depends heavily on the queue on their servers. During my tests, it varied from 5 minutes to sometimes almost 30 minutes during peak hours. The best thing is to launch the generation and do something else while waiting for the email notification.
Conclusion: My verdict on Hitem3D 1.5
So, is Hitem3D 1.5 the magic tool to transform any photo into a perfect 3D model? Not quite, but it comes impressively close. For creators, makers, and 3D artists, it’s a considerable time-saver, especially for creating highly detailed working bases.
Its strength lies in the quality of surface details obtained with high-resolution modes, and in the geometric consistency provided by multiview. It doesn’t (yet) replace an artist for retopology or finishing, but it makes 3D creation from images accessible in a stunning way.
✅ Pros
- Stunning surface details in 1536^3/1536^3 Pro
- Effective multiview for 360° consistency
- Free retries (x3) that save borderline cases
- Complete export (STL/OBJ/FBX/GLB) – ready for 3D printing
- Convincing Head mode for portraits
❌ Cons
- Generated meshes are very dense (retopology often necessary)
- Possible server queues
- AI can still “hallucinate” on complex parts
🤝 Partnership & transparency
Hitem3D sincerely thanks the 3D artist Le CréAtelier for his review and interpretation of our product.
Editor: Ruiz Zhou