You have just spent hours, or perhaps even days, waiting for your 3D printer to finish a highly anticipated masterpiece. You finally pull it off the build plate, but instead of the flawless, commercial-grade replica you envisioned, you are met with harsh layer lines, rough support marks, and an underwhelming, glossy plastic sheen. This is an incredibly common frustration for creators across the globe. If you want to transform your raw printer output into a polished, professional-quality masterpiece, you must learn how to post-process 3D prints.
Whether you are crafting intricate cosplay armor, highly detailed tabletop miniatures, or functional engineering prototypes, mastering the art of 3D print finishing is what separates enthusiastic amateurs from seasoned professionals. It is the crucial bridge between digital fabrication and traditional craftsmanship.
In this comprehensive guide, we will explore the essential techniques and proven workflows to properly clean, seamlessly smooth 3D prints, perfectly paint 3D prints, and apply advanced chemical treatments. By the end of this article, you will have all the knowledge needed to elevate your creations to the next level.
What Does It Mean to Post-Process 3D Prints?
Post-processing 3D prints refers to the collection of physical, chemical, and aesthetic techniques applied to a raw 3D printed model after it leaves the printer to improve its dimensional accuracy, surface finish, visual appeal, and mechanical strength.
This workflow is not a single action but a multi-step process. It typically involves removing temporary support structures, washing and UV curing (for resin-based prints), sanding away visible layer lines, applying specialized gap fillers and primers, and finally adding custom paint or protective clear coatings to achieve a smooth, professional-grade final product.
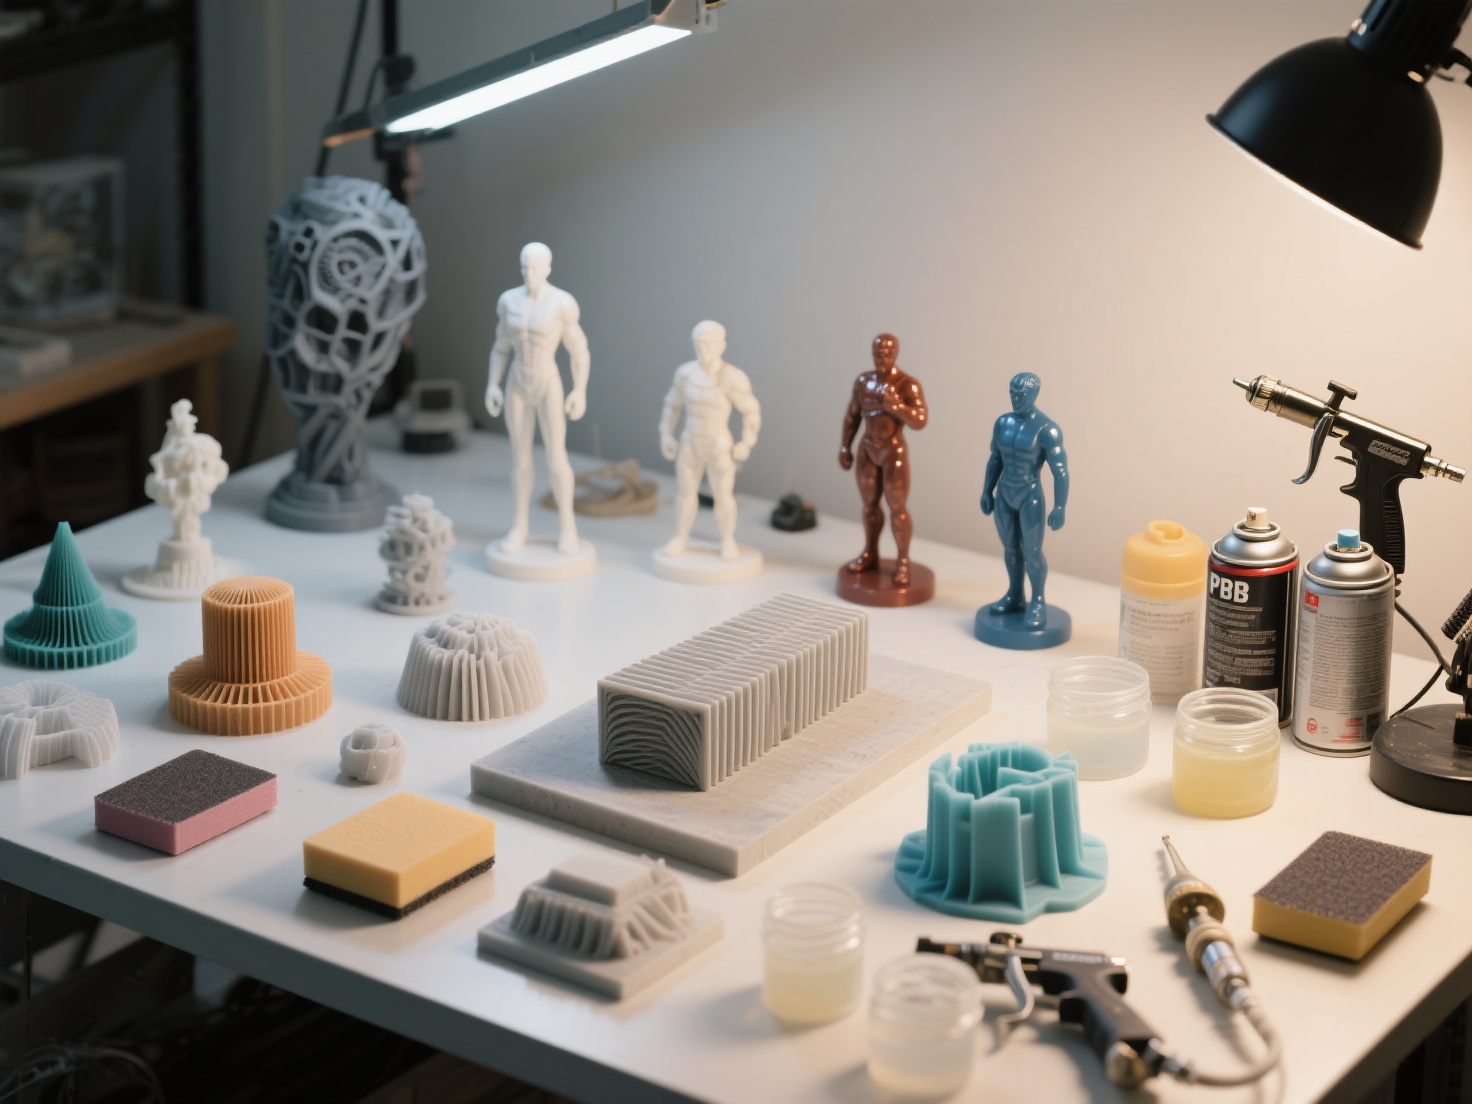
Essential 3D Print Finishing Techniques
To achieve that flawless, injection-molded look, you need to understand the fundamental steps of 3D print finishing. Here is a detailed breakdown of the core techniques tailored for both FDM (Fused Deposition Modeling) and SLA (Resin) prints.
1. Support Removal and Initial Cleaning
The very first step in any post-processing workflow is getting your raw model cleaned up and ready for treatment. Rushing this step can result in broken models or deep gouges in the plastic.
For FDM Prints: Carefully snap off the larger support structures using your hands or needle-nose pliers. For areas where supports connect to the model, use flush cutters to snip them away cleanly. Be gentle to avoid tearing the outer perimeters of your print. A sharp hobby knife or a specialized deburring tool is excellent for scraping away any leftover plastic nubs.
For Resin Prints: Before removing any supports, you must wash the print thoroughly in isopropyl alcohol (IPA) to dissolve any uncured, sticky liquid resin. Once washed, it is highly recommended to carefully clip the supports off before final UV curing. Uncured resin is slightly softer, making supports less prone to leaving deep craters when removed. Afterward, fully cure the model under a dedicated UV lamp or in direct sunlight.
2. How to Sand 3D Prints for a Flawless Surface
If your goal is to perfectly smooth 3D prints, sanding is an unavoidable reality. The secret to professional success is a concept called grit progression—starting with coarse sandpaper to remove major imperfections and gradually moving to finer grits to polish the surface.
- Start Coarse (120-220 Grit): Use these lower numbers to aggressively knock down the most prominent layer lines, z-seams, and leftover support marks.
- Move to Medium (400-600 Grit): This step smooths out the visible scratches left behind by the coarse grit paper.
- Finish Fine (800-2000+ Grit): High-grit papers are used to polish the surface.
Pro Tip: Always Wet Sand. When you sand 3D prints, especially PLA and PETG, the friction generates heat that can melt the plastic, ruining the details. Wet sanding (dipping waterproof sandpaper in water) keeps the plastic cool and prevents plastic dust from clogging the abrasive grit. Furthermore, always wear a particulate mask to avoid inhaling microplastics.
3. Filling and Priming the Surface
Sanding alone rarely eliminates every single microscopic layer line. To get a truly flat surface, you need to fill in the gaps.
Wood Filler or Modeling Putty: For deep support scars, noticeable gaps where multi-part prints join together, or minor print failures, use a modeling putty (like Bondo glazing spot putty) or standard wood filler. Apply it with a small spatula, let it dry completely, and sand it flush with the surrounding surface.
Filler Primer Spray: A high-build filler primer is a post-processing lifesaver. This sprayable primer contains micro-fillers that actively settle into the remaining shallow layer lines. Spray a light, even coat, let it dry, and then lightly wet sand it with 600-grit paper. Repeat this process two to three times until the surface feels as smooth as glass.
4. How to Paint 3D Prints Like a Pro
Once your 3D printed canvas is perfectly smooth and primed, it is time to bring it to life with color. Learning to paint 3D prints effectively requires patience and selecting the right application method.
Spray Paint (Rattle Cans): Excellent for applying base coats and covering large, even areas with solid color. Ensure you spray in light, sweeping bursts from 8-10 inches away. Applying too much paint at once will cause ugly drips and obscure the fine details of your model.
Airbrushing: This is the gold standard for professional model makers. Airbrushing provides ultra-smooth gradients, precise highlights, and realistic shading. Because the layers of paint applied are incredibly thin, you will not lose the sharp geometric details of your print.
Hand Brushing: Ideal for micro-details, edge highlighting, and weathering effects (such as dry-brushing metallic silver to simulate chipped metal). Use high-quality acrylic model paints and remember to thin them with a few drops of water to ensure smooth brush strokes.
5. Advanced Chemical Smoothing Techniques
For certain specific materials, you can bypass the tedious process of heavy sanding by utilizing chemical or liquid coatings.
Acetone Vapor Smoothing (ABS Only): By exposing ABS prints to controlled acetone vapors in an enclosure, the outer shell of the plastic gently melts. This completely erases all layer lines and leaves a glossy, injection-molded finish. Warning: Do not use this method on PLA or PETG prints, as acetone does not react smoothly with these plastics.
Epoxy Resin Coating: For FDM parts that are difficult to sand, you can brush on a thin layer of specialized 3D print epoxy (such as XTC-3D). The epoxy automatically self-levels over the model and cures into a hard, glossy shell, effectively burying layer lines in a single, durable step.
Real-World Applications of Post-Processed Prints
Taking the time and effort to thoroughly post-process 3D prints dramatically expands their utility and visual value across various industries.
Cosplay and Prop Making: A raw, shiny PLA sword looks exactly like what it is—a plastic toy. However, a properly sanded, primed, and expertly painted sword with layered metallic dry-brushing and leather-wrapped handles looks like a heavy, authentic cinematic prop ready for the big screen.
Tabletop Miniatures and Dioramas: For Dungeons & Dragons or Warhammer enthusiasts, properly washing, UV curing, and priming resin miniatures is non-negotiable. A flawless base ensures that thin acrylic paints adhere perfectly, allowing painters to execute microscopic eye details, glowing magical effects, and weathered armor.
Functional Prototyping: Engineers and product designers often use heavy filler primers and matte paints to make 3D printed prototypes closely resemble the final injection-molded commercial product. This level of finish is absolutely crucial for stakeholder pitches, investor meetings, and ergonomic aesthetic testing.
Best Practices and Recommended Workflow
To save yourself hours of frustration and avoid ruining your hard work, follow this proven step-by-step workflow checklist:
| Step | Action Required | Recommended Tools & Materials |
|---|---|---|
| 1. Preparation | Remove supports, deburr edges, wash/cure (for resin) | Flush cutters, hobby knife, IPA, UV Station |
| 2. Gap Filling | Fill structural seams, joints, and deep surface holes | Bondo spot putty, wood filler, small spatula |
| 3. Sanding | Wet sand progressively from coarse to fine | 220, 400, and 800-grit waterproof sandpaper |
| 4. Priming | Apply filler primer, dry, and wet sand the primer layer | Automotive filler primer spray can |
| 5. Painting | Apply base colors, shading, and fine details | Airbrush, high-quality acrylic model paints |
| 6. Sealing | Protect the finished paint job with a clear coat | Matte, satin, or gloss clear acrylic varnish |
The Golden Rule: Start with a Superior 3D Model
The absolute best way to drastically reduce your post-processing time is to start with a high-quality, print-ready 3D model. Models with messy underlying geometry, non-manifold edges, or low-resolution polygons slice poorly. This leads to massive printing artifacts, blobs, and z-seam errors that require hours of aggressive sanding and filling to fix.
This is exactly where next-generation AI-driven tools are revolutionizing the creative workflow. A great finish starts with Hitem3D.
Hitem3D is an AI-powered 3D model generator that creates production-ready models with incredibly clean geometry and razor-sharp edges. Utilizing its proprietary high-precision Sparc3D model, it features innovative Invisible Parts technology that accurately reconstructs hidden structures beyond the visible surface. This means you get a solid, geometrically sound mesh with up to 1536³ Pro resolution (up to 2 million polygons).
Because the geometry is pristine, curves print as actual smooth curves rather than blocky, segmented steps. With one-click direct exports to Bambu Studio and OrcaSlicer, you generate models that print flawlessly right out of the gate. Better raw prints mean significantly less time sanding and much more time enjoying the creative process of painting. Furthermore, if you are utilizing multi-color 3D printing, Hitem3D’s Multi-Color Segmentation feature instantly divides models into clean color regions, saving you the hassle of manual painting altogether.
Conclusion: Elevate Your 3D Printing Journey
Learning to properly post-process 3D prints is a highly rewarding skill that empowers you to turn standard plastic extrusions into stunning, museum-quality works of art. By mastering essential techniques like progressive wet sanding, utilizing high-build filler primer, and applying professional paint layers, you unlock the true potential of your 3D printer.
However, remember that the foundation of any great finish is a flawless digital model. If you are tired of spending countless hours fixing messy geometry and dealing with infinite sanding due to poor print resolution, it is time to let AI do the heavy lifting for you.
Hitem3D is trusted by creators in over 50 countries to transform 2D images into high-fidelity, print-ready 3D models. Built on powerful in-house AI models, it delivers clean geometry, sharp edges, and stunning 4K PBR-ready textures—all while offering a Free Retry system so you can perfect your model without wasting credits.
Ready to generate flawless models and cut your finishing time in half? Create For Free today and transform your entire 3D printing workflow.
Frequently Asked Questions (FAQ)
Q: Can you perfectly smooth 3D prints made of PLA using acetone?
No, you cannot. Acetone does not chemically react with PLA in the same melting manner it does with ABS. Exposing PLA to acetone may cause it to become rubbery, structurally weak, or severely discolored, but it will not smooth the layer lines. To smooth 3D prints made of PLA, you should rely on progressive wet sanding, filler primer, or applying a dedicated epoxy resin coating.
Q: Do I really need to wash and cure resin prints before I start sanding them?
Yes, this is an absolute safety requirement. Uncured liquid resin is toxic, sticky, and hazardous to your skin. You must wash the print thoroughly in high-concentration IPA and fully cure it with UV light. This ensures the material is completely solid and safe to handle before you begin to sand 3D prints, preventing toxic dust from contaminating your workspace.
Q: What is the best type of primer to use before I paint 3D prints?
An automotive filler primer (available in a standard spray can) is highly recommended by professionals. It contains micro-particles designed to fill in shallow scratches and layer lines. This provides a beautifully smooth, matte surface that gives acrylic, enamel, and airbrush paints an excellent textured grip for long-lasting adhesion.