Generating a 3D model with Hitem3D is really easy, literally just a matter of a few clicks. But if you want to obtain the best possible result, you need to create a workflflow that allows you to generate the model exactly how you need it. So, in this article, I’m going to walk you through my typical workflow to generate perfect models with Hitem3D. Let’s get into it!
Choosing the Subject
It all starts from the subject. It seems an irrelevant detail, but this is actually a really useful step to avoid wasting time further down the road.
Ask yourself what you want to create with Hitem3D, and then proceed doing an initial consideration: is this kind of model suitable for processing with Hitem3D?
The strong point of this tool is organic shapes, such as figurines, animals, cars, and natural elements. Functional objects, which require precise constraints and dimensions – for instance, a tool holder –could become complicated to generate with this software because we can’t add dimensions references.
So, before you even start collecting pictures, reflect on whether this is the right type of model for Hitem3D or if designing the object in CAD would be more convenient. This will allow you to save precious time in your workflow.

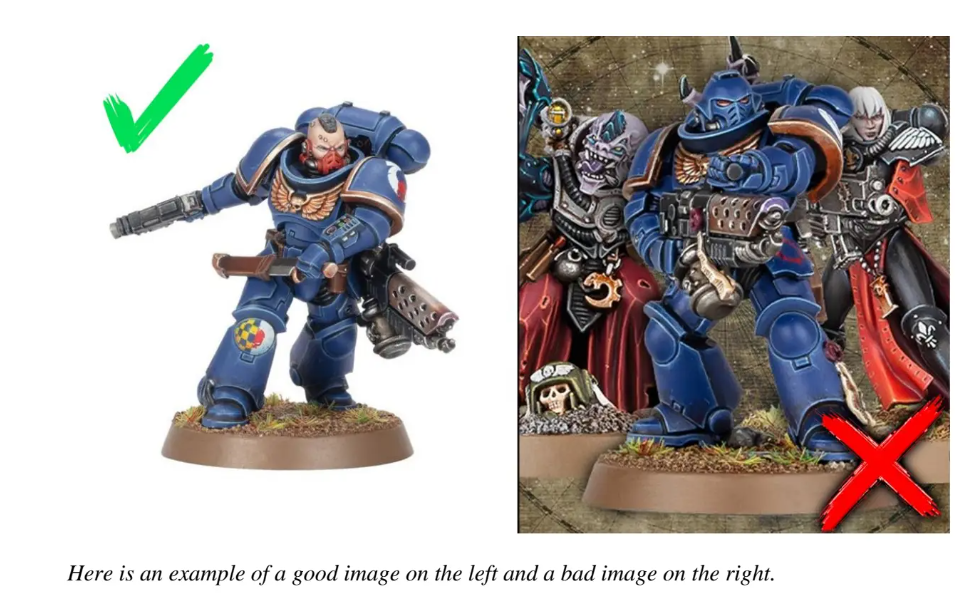
On the left is a perfect subject for Hitem3D, while on the right is an object best suited for CAD modeling.
Establishing the Objective
Now that we have chosen our subject, we need to establish what we’ll use this model for.
This step is also really important because it affects the type of photo and processing we’ll need to generate the model in Hitem3D. For instance, a model for rendering will require an image not onlyof the model’s geometry itself, but also of the detailed texture needed for rendering.
Here is a recap of what requirements I established for the images based on the objective of the model:
- Model for Rendering: The picture needs to present the texture of the object well and needs to match the final appearance of the model in the rendering.
- Model for 3D Printing: The most important thing in this case is geometry, so the image needs to clearly show all the geometry features I want to be generated in the model.
- Extremely Detailed Model: The picture must show all the details I want Hitem3D to reproduce.
Saving/Generating Pictures
Once I have chosen the subject and the type of picture I need, I start collecting photos. Collecting high-quality images is key to a great result. If you give Hitem3D a poor-quality image, the result will be a poor-quality model.
I usually spend some time saving different images and then select the b best one to use as the reference. Pictures with a neutral background are best for processing, but you can download any type of image and remove the background later if necessary.
I look for p photos where the subject is well defined and any geometric details are clear and visible. It’s important to avoid reflections or any other kind of noise in the picture.
To collect images, you can either shoot yourself the photos if you want to replicate an object you already own, you can find them online, or finally generate them with an AI image generator. The choice usually depends on what you want to generate, for example, a fantastic creature might be a perfect subject for an AI image generator.
Finally, if I want to use the Multiview mode, I look for photos from different perspectives of the same scene and object. This is a great tip for those who might have problems with the multi-view g generation due to using disconnected images as references.

Photo Editing
This is an optional step since it is tied to the quality of the pictures you have found/generated. It is not always necessary, but sometimes it is useful to edit the photo to improve the reference for Hitem3D.
I usually use Photoshop, but for simple jobs, online websites can also get the job done to remove the background quickly. If you want to make some more adjustments, such as the exposure of the image, you’ll probably need an image editor.
In some cases, it is also necessary to increase the resolution of the image using special tools. This is especially true for a an A AI image generators or p pictures you might have found online t that were uploaded in a low resolution.
Choosing the Resolution for the Model
This step is related to the previous phase, when I defined the purpose of the model I am going to generate. Here is a summary of the settings I use, based on the final objective of the model.
- Model for Rendering → Activate the texture.
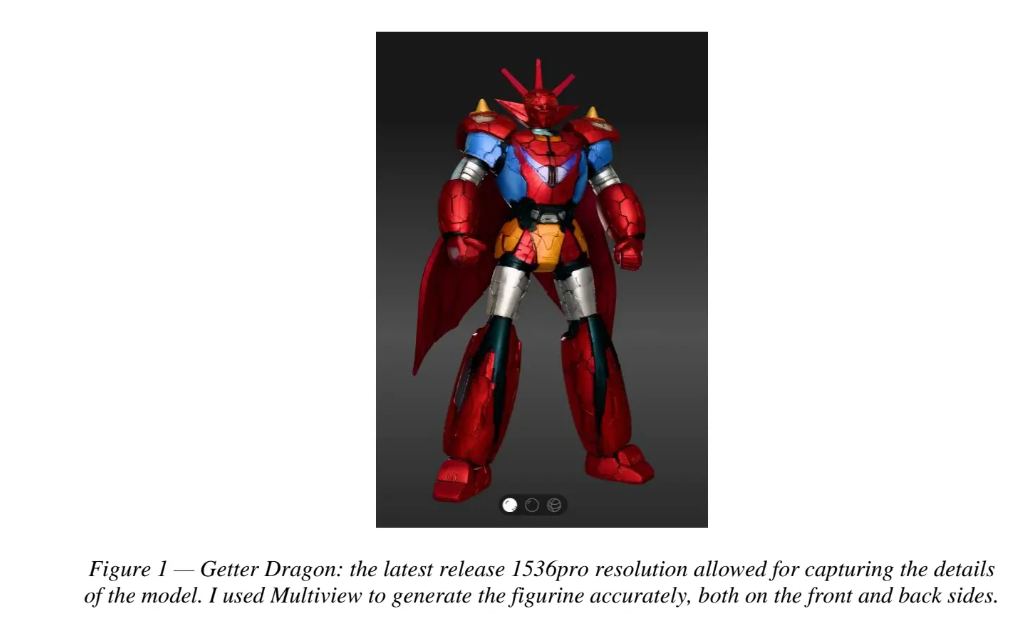
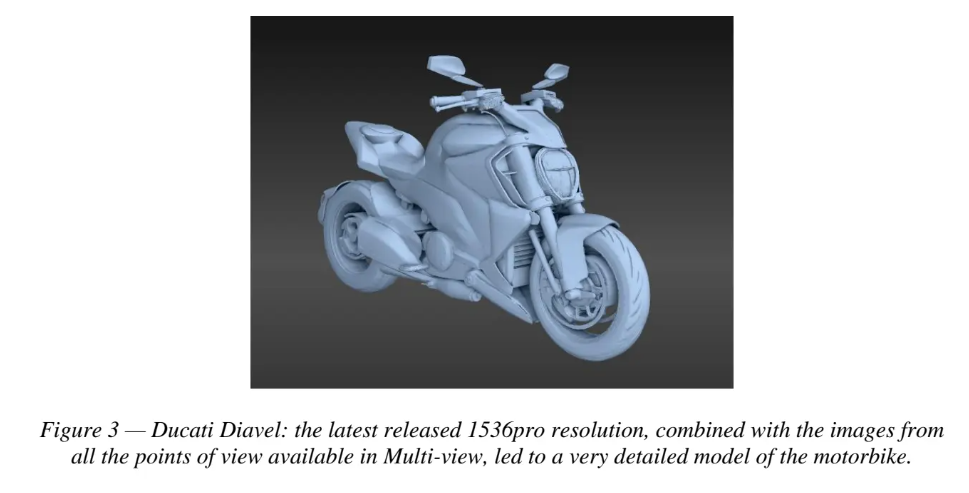
- Detailed Model → Use the 1536pro resolution to get the best and most detailed result.
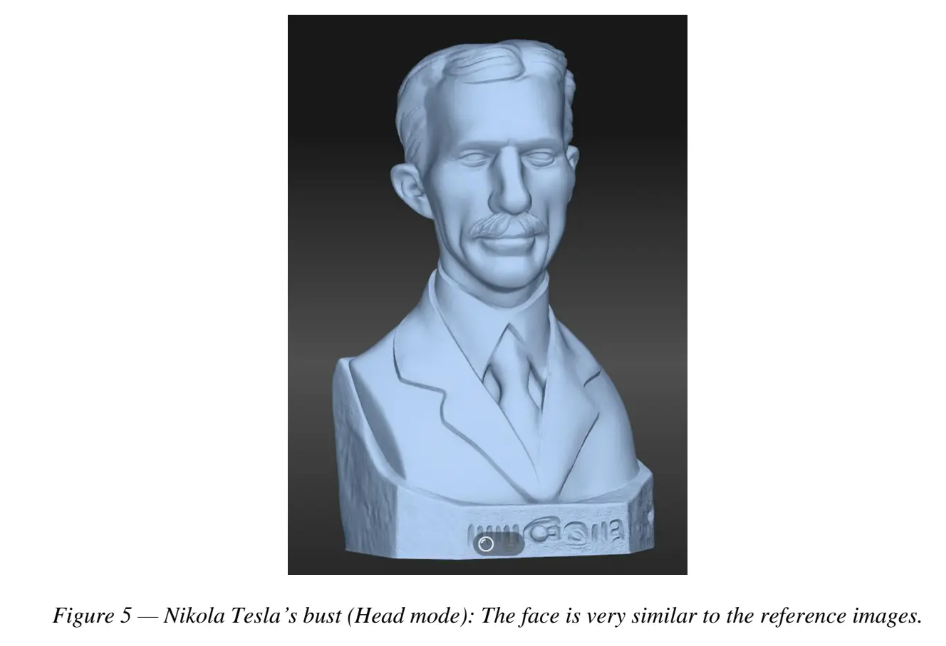
- Person Figurine or Portrait → Switch to head mode.
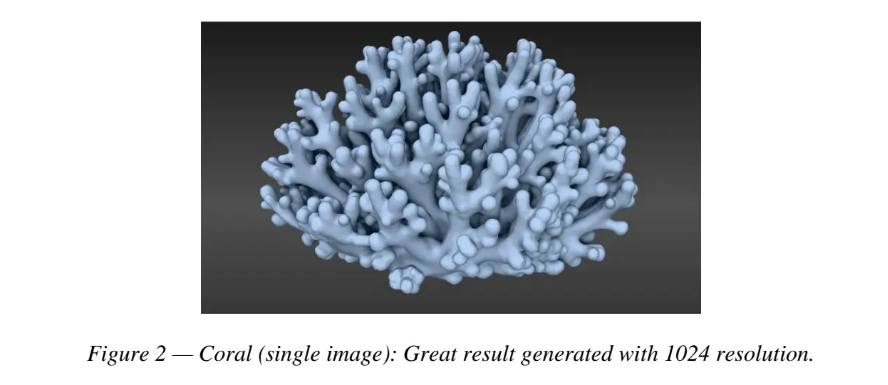
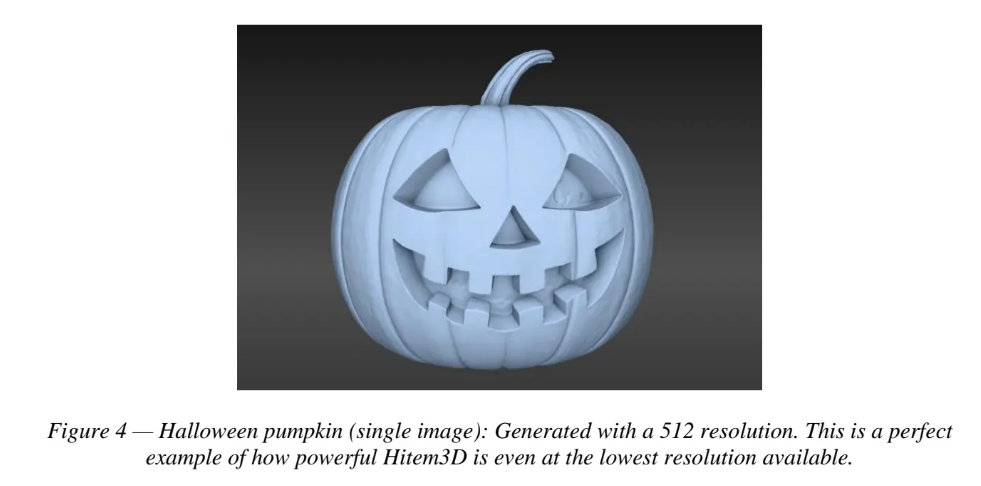
- Simple Object/Only Interested in the General Shape of the Model → Use the 1024 resolution to save time and credits, or even the 512 for really simple subjects.
I also consider whether multiview mode—which takes longer to process—is necessary or if a single image can be used. For i instance, if I only need part of the model, a single i image that clearly highlights that area of the geometry is sufficient.
Image Loading and Model Generation
Now that I have collected all the pictures and settings I need to generate the model, I can load the images into Hitem3D and let it do its job.
I usually process models in bulk to save time. I start the generation for multiple models and wait for hitem3D to finish.
Model and Texture Check
When Hitem3D has finished generating the model, I check whether the result is satisfactory directly from the web interface. If I notice any errors, I use the “Free Retry” until I’m satisfied. Usually, one retry is sufficient to generate the model with the right details.
It is also possible that, despite the regeneration, some features may not turn out as I want them to. This is usually due to the reference image(s) I’ve uploaded, so I generate the model using another reference if the first result doesn’t match the requirements for my project.
Here are some models that I’ve generated with Hitem3D:
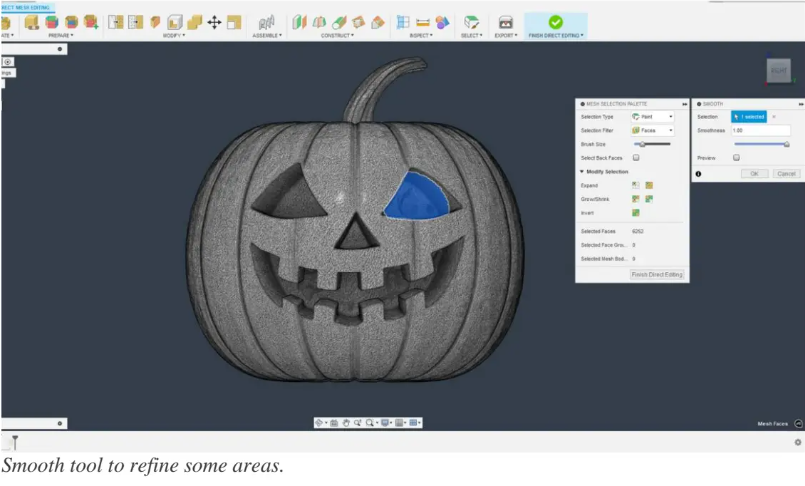
Model Refinement
Once Hitem3D has generated the model, I can refine the geometry depending on my purposes. Usually, I use these models for 3D printing or for animations, so I download the generated mesh in .stl format to import it into Fusion. There, I process the mesh to make it “watertight,” easier for the slicer to process, and smoother in areas w where the image may not have been perfect and there is noise.
In summary:
- Use “Repair” to repair any holes.
- Use “Remesh” if any groups of faces need to be regenerated.
- Use “Reduce” if you want a model with fewer polygons for easier handling.
- Use “Smooth” to make rough areas smoother.
Slicing
As I previously mentioned, I usually 3D print the models I generate with Hitem3D. So, once I have finished refining the model, I import it into the slicer to prepare the G-code to send to my 3D printer. The tools I usually utilize to prepare the model are:
- Use the “Cut” tool to divide the model into parts if necessary.
- Use “Color painting” if you want a multicolor 3D print.
- Use “Supports painting” to ensure that critical areas have a supporting structure.
Final Details
When the 3D printer has finished, I remove the supports and clean any imperfections in the 3D p print.Since Hitem3D generates great models of creatures and characters, I sometimes prefer to use a resin 3D printer to maintain more details. When the object is finished, I paint the model to make it even more realistic.
Finally, depending on the model, I can proceed t to create any bases, accessories, and d details to add the finishing touch.
Conclusion
Generating a 3D model with Hitem3D is really easy. Today, I shared with you my workflow to obtain the best possible result with this really powerful software. Hitem3D is perfect for AI enthusiasts, makers, and 3D artists. It’s a tool that allows us to save time and have fun. All you have to do is try it!
Introduction of Author
A heartfelt thank you to Gloria, our 3D modeling expert, for sharing this incredibly detailed and practical workflow guide.
Gloria is a passionate maker and 3D artist with a keen eye for optimizing digital creation pipelines. His expertise lies in bridging the gap between powerful AI tools and tangible, high-quality results, whether for animation, rendering, or 3D printing. In this comprehensive guide, he demystifies the entire process—from selecting the perfect subject and defining project goals to the crucial post-processing steps that elevate a good model into a great one. His methodical approach ensures that both beginners and seasoned professionals can learn how to use Hitem3D efficiently and effectively.
Editor: Ruiz Zhou